Essential Tools and Materials for Window Installation Alexandria, VA Projects

Handyman installing mosquito net, mosquito wire screen on brick house window. Handyman installing mosquito net, mosquito wire screen on brick house window. window repair stock pictures, royalty-free photos & images

When embarking on a window installation project, having the right tools and materials is crucial to ensure efficiency, precision, and safety. This guide outlines the essentials that every homeowner or professional installer should have before starting the process.

Essential Tools

  • Measuring Tape: Accurate measurements determine window fitment. A durable measuring tape is indispensable.
  • Utility Knife: Useful for cutting caulking, insulation, or any other materials during removal or installation.
  • Pry Bar: Helps in removing old trim or frames without causing damage to the surrounding area.
  • Caulking Gun: Ensures precise application of sealant around windows to prevent air and water leakage.
  • Drill/Driver: Needed for securing screws into frames or wall studs. Power drills save time when compared to manual screwdrivers.
  • Level: A level ensures that windows sit evenly during installation, preventing operational issues later on.
  • Hammer and Nails: Necessary for securing wooden trims or making adjustments to framing if required.
  • Putty Knife: Useful for applying filler materials like glazing putty around window frames or sills.
  • Safety Gear: Goggles, gloves, and dust masks reduce risks associated with debris and sharp objects during installation.

Required Materials

Material Purpose
Replacement Windows Should be selected based on size, energy efficiency rating, and style
Insulation Foam Expanding foam fills gaps between the frame and wall opening
Caulk/Sealant Provides a weatherproof barrier between the window frame and wall
Flashing Tape Prevents water infiltration at vulnerable points like sills
Shims Helps align windows perfectly during installation
Exterior Trim/Cladding Provides aesthetic finishing while protecting edges against moisture

Specialized Tools (Optional but Helpful)

  • Oscillating Tool: Ideal for trimming small areas around openings where precision is key.
  • Window Sucker Handles: Used to lift heavy glass windows safely without risking damage.
  • Chalk Line Tool: Helpful in marking guidelines during framing adjustments or placement.

Tips for Organizing Tools and Materials

  1. Arrange all tools in a clean workspace before starting; this minimizes time spent searching mid-project.
  2. Double-check measurements and material quantities before purchasing supplies.
  3. Invest in quality over budget equipment—durable tools last longer and offer better performance.

Having these tools at hand ensures your window installation project progresses smoothly from start to finish while minimizing potential errors or issues along the way.

Ensuring the Perfect Fit: Measuring for Windows Alexandria, VA Homes

Accurate measurements are a critical first step in ensuring a proper window fit. Incorrect dimensions can lead to gaps, drafts, and additional costs due to improper installation or the need for adjustments. Below is a detailed guide on how to measure window dimensions accurately.

Essential Tools for Installing Replacement Windows Alexandria, VA

Before getting started, gather these essential tools:
Measuring Tape: A sturdy, retractable tape measure is ideal for precise readings. – Notepad or Smartphone: To record measurements and avoid errors. – Level: To check if the existing frame is plumb and squared. – Pencil or Marker: For marking spots as needed during the process.

1. Measure the Width

  • Top Width: Measure from one side jamb (vertical side of the frame) to the other at the top.
  • Middle Width: Record a measurement across the middle section of the opening.
  • Bottom Width: Take the measurement from side jamb to side jamb along the bottom edge.
  • Use the smallest measurement of these three as your final width dimension. This ensures that your new window will fit even if there are slight irregularities in frame alignment.

2. Measure the Height

  • Left Height: Measure from the head jamb (top horizontal piece) down to where you will install it at the sill.
  • Center Height: Measure vertically in line with what would be roughly center-point area through appropriate sill depths endpoints . ✅

Step-by-Step Guide to Window Glass Replacement in Alexandria, VA

Installing a window involves a precise and methodical approach to ensure durability, energy efficiency, and aesthetic appeal. Below is a step-by-step guide to help you understand the professional process of window installation.

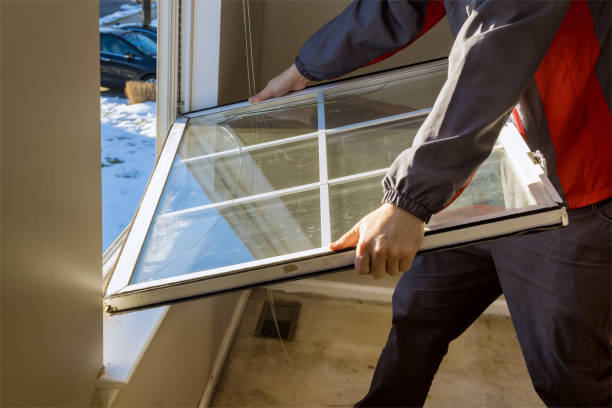
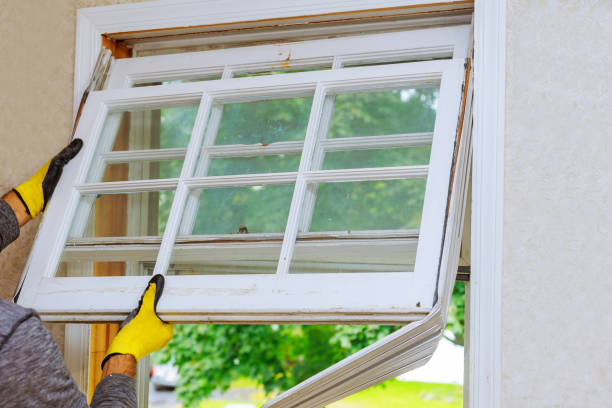
Step 1: Removing the Old Window

  • Removing Trim and Stops
    Use a pry bar or putty knife to gently remove any interior or exterior trim without breaking or splintering it. This step ensures easy reinstallation if needed.
  • Cutting Paint or Caulk Seals
    Run a utility knife along any painted seals between the window frame and wall structure to loosen the bond.
  • Detaching the Existing Window
    Unscrew or pry out nails securing the old window frame. Once free, remove it from its opening. Ensure no debris or remnants are left behind that could interfere with the new installation.

Step 2: Preparing the Opening

  • Cleaning Any Debris
    Clear out dirt, caulk residue, or shims from the opening. A clean surface allows for proper alignment of your new unit.
  • Checking for Rot or Damage
    Inspect surrounding wood framing for signs of rot or damage caused by moisture infiltration. Repair any compromised areas before proceeding further.
  • Measuring For Accuracy
    Confirm that measurements are accurate and match those of your replacement window. This reduces potential alignment issues during installation.

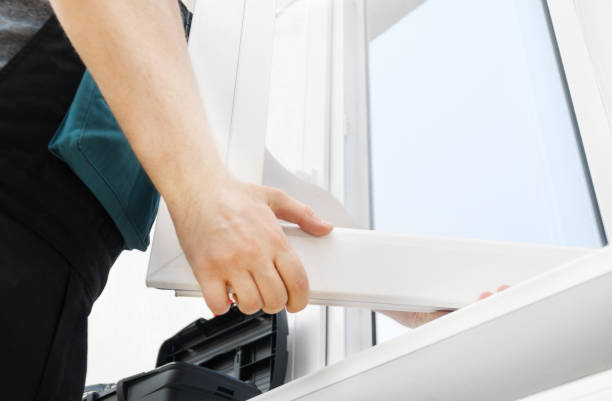
Step 3: Placing and Leveling the New Window Unit

  1. Apply Flashing Tape: Install self-adhering flashing tape along the sill area to prevent future water infiltration.
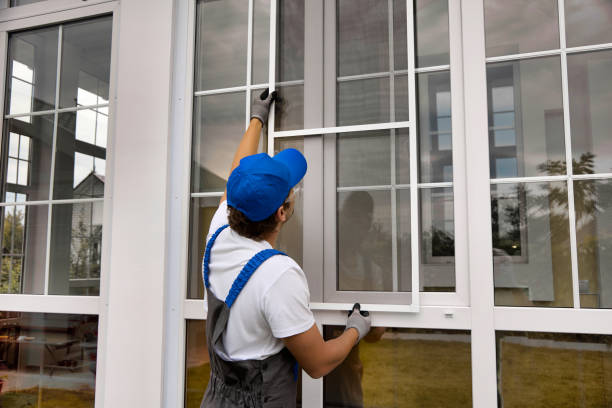
  2. Set in Place: Carefully position your new window within the opening, centering it so there is equal spacing on all sides.
  3. Level and Square: Use a level tool on both horizontal and vertical edges of your unit, ensuring even alignment before attachment.
  4. Secure Temporarily: Insert shims around key points like corners for temporary stability before permanently fastening screws.

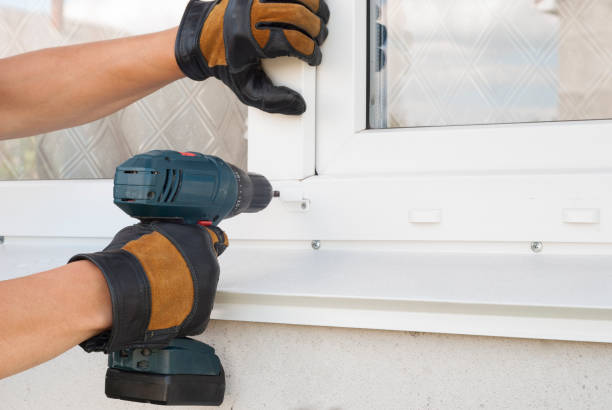
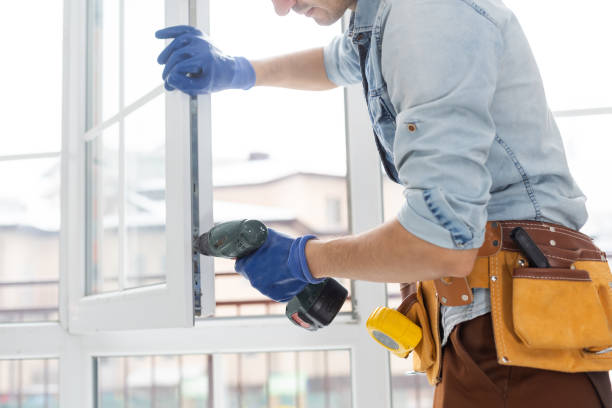
Step 4: Securing The Window in Place

  • Place screws through pre-drilled holes in mounting flanges.
  • Avoid over-tightening fasteners as this could warp frames.
  • Regularly check alignment throughout fastening steps.

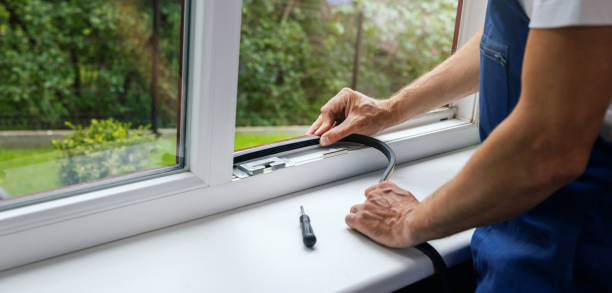
Step 5: Insulating Around The Frame

  • Fill gaps between framing material with low-expansion spray foam designed specifically for windows.
  • Trim excess insulation foam once it has cured, taking care not to obstruct operation mechanisms like sash movement.

Step 6: Adding Finishing Touches

  • Reinstall interior/exterior trim using finishing nails.
  • Apply exterior-grade silicone caulking where necessary around edges.
  • Paint touch-ups as needed if trim was damaged during earlier steps.
Task Tools Required Time Estimate
Remove Old Window Pry bar, utility knife ~30 minutes
Prepare Opening Brush/cleaner ~20 minutes
Level & Secure New Unit Level tool, drill ~45 minutes
Insulate Gaps Spray foam ~15 minutes
Add Trim & Sealant Nail gun, caulking gun ~30 minutes

By following these structured steps with attention to detail at every stage, professional installers ensure windows are functional, efficient, and visually appealing over time while minimizing potential complications post-installation.

Key Factors to Consider When Choosing Energy-Efficient Replacement Windows

When it comes to replacing windows, choosing energy-efficient options is a crucial decision that impacts your home’s energy usage, comfort, and long-term savings. With so many products available in the market, it’s essential to evaluate a few key factors before making your selection. Below are important considerations to guide your decision-making process.

Energy Performance Ratings

  • U-Factor: Measures the rate of heat transfer. Lower values indicate better insulation performance.
  • Solar Heat Gain Coefficient (SHGC): Indicates how well the window blocks heat from sunlight. A lower SHGC is ideal for warm climates, while higher values may be better for colder areas where solar heat can help reduce heating costs.
  • Visible Transmittance (VT): Reflects the amount of natural light that passes through the window glass. Higher VT numbers allow more light but should strike a balance with energy performance.

Consider windows certified by organizations like ENERGY STAR®, as they meet stringent energy-efficiency standards tailored to specific climate zones.

Frame Materials

Material Pros Cons
Vinyl Affordable, low-maintenance, good insulator Limited color options
Wood Excellent insulator, classic aesthetic Requires regular maintenance (painting/sealing)
Aluminum Durable and lightweight Poor insulation properties unless thermally improved
Fiberglass Highly durable and efficient Higher upfront cost

Evaluate which material balances aesthetics, efficiency, and cost for your specific needs.

Glazing Options

  • Double or Triple Pane Glass: Provides added insulation by incorporating air or gas-filled spaces between panes (e.g., argon or krypton gas).
  • Low-E Coatings: Microscopically thin metallic layers that reflect heat while allowing natural light to pass through. They help maintain indoor temperatures throughout the year without reducing clarity or visibility.
  • Tinted Glass: Reduces glare and provides UV protection while enhancing privacy.

Climate Considerations

  • For regions with colder winters, prioritize low U-Factor ratings and multiple panes filled with insulating gas.
  • In hot climates with intense sunlight exposure, opt for windows with low SHGC values and Low-E coatings designed to block excess heat.

Matching your window choice to your region’s climate ensures optimal performance year-round.

Durability & Warranty Coverage

Investing in durable replacement windows translates into fewer repairs or replacements over time. Opt for manufacturers offering robust warranties that cover defects such as seal failures or frame warping—this provides peace of mind about long-term reliability.

Selecting energy-efficient replacement windows is an essential step toward lowering utility bills and creating a more comfortable living space while reducing environmental impact over time. By carefully considering these factors—from performance ratings and materials to glazing innovations—you can make an informed decision tailored specifically to your home’s requirements.

Person Applying Silicone Sealant Close-up Of Person Hands Applying Silicone Sealant With Caulking Gun window repair stock pictures, royalty-free photos & images

Preparing Your Home Effectively for Seamless Window Replacement in Alexandria, VA

Proper preparation before starting a window installation project is essential for ensuring efficiency, safety, and success. By addressing key factors ahead of time, homeowners can minimize disruptions and ensure that installers have everything they need to complete the job effectively. Below are practical steps and considerations to prepare your home for a seamless window installation experience.

Clear the Area Around the Windows

To provide an unobstructed workspace for the installers, it’s crucial to clear the area both inside and outside of your home near the windows. This will help protect your belongings while ensuring easy access to each window.

  • Remove curtains, blinds, or other window coverings.
  • Take down decorations or wall hangings near windows.
  • Move furniture at least three to four feet away from each window.
  • Cover remaining furniture with protective sheets to prevent dust accumulation.
  • Trim back shrubs, trees, or plants near windows.
  • Remove outdoor furniture or decorations close to windows.
  • Ensure pathways around your home are clear for installers’ equipment.

Protect Flooring and Surfaces

Window installation can generate dust and debris, which may affect floors or other surfaces in your home. Taking precautions can prevent damage and make cleanup easier after the project is complete.

  • Lay down drop cloths or tarps in areas where installers will be working.
  • Use adhesive carpet protection film in high-traffic zones.
  • Cover hardwood floors with padded material to avoid scratches from tools or ladders.
Surface Type Recommended Protection Method
Carpet Adhesive film or thick drop cloth
Hardwood Floors Padded floor protector
Tile/Concrete Standard tarps

Secure Pets and Children

For safety reasons, pets and children should be kept away from work areas during installation. This ensures their well-being while allowing workers to focus on their tasks without distractions.

  • Set up a temporary pet-safe area away from windows being replaced.
  • Communicate with children about avoiding work zones during installation hours.
  • If necessary, schedule childcare arrangements during the project timeframe.

Communicate With Installers

  1. Project Timeline: Confirm start times, estimated duration of work, and any potential delays.
  2. Entry Points: Determine which doors will be used by workers for entering/exiting your home.
  3. Special Requests: Notify installers about any specific concerns (e.g., fragile landscaping).

Verify Accessibility to Utilities

  • Confirm electrical outlets near work areas are functional.
  • Inform installers of circuit breaker locations if needed.

By following these preparation steps systematically, you’ll create an organized environment that facilitates smoother progress during window installations while protecting both your property and household members.

Proper Techniques for Leveling, Securing, and Insulating New Window Units

Ensuring that new window units are properly leveled, secured, and insulated is critical to achieving optimal performance and longevity. Poor installation can result in air leaks, water intrusion, and structural instability. Below is a guide on the proper techniques to follow for leveling, securing, and insulating your new windows.

Importance of Proper Leveling

Leveling ensures that windows function smoothly and last longer. Misaligned windows can cause issues such as difficulty operating the sashes or uneven wear on the frame.

Steps for Proper Leveling: 1. Use a Spirit Level: Place a high-quality spirit level along both the bottom and sides of the window frame to verify horizontal and vertical alignment. 2. Adjust Shim Placement: Insert shims as needed between the window unit and framing to correct any unevenness. 3. Double-Check Alignment: Before fully securing the window, recheck its alignment using your level to ensure no shifts occurred during adjustment.

Securing Your Window Units

Once properly leveled, it’s essential to secure the window in place to prevent movement caused by wind loads or temperature changes over time.

  1. Pre-Drill Holes: To avoid splitting the framing material or damaging the window unit, pre-drill holes where you plan to insert screws.
  2. Attach screws through pre-drilled holes in the designated mounting flanges of your window.
  3. For large windows with multiple panes or heavy frames, additional fasteners may be needed along both side jambs for added support.
  4. Avoid Over-Tightening: Over-tightening screws can warp the frame or create pressure points that compromise insulation integrity.

Effective Insulation Techniques

Proper insulation minimizes energy loss around your new windows while also reducing noise transmission from outside.

  • Use low-expansion foam specifically designed for windows to fill gaps between frames and walls without distorting them.
  • Opt for backer rods or weatherstripping materials if foam isn’t suitable for certain areas.
  • Clean around all edges before applying foam or other fillers to ensure strong adhesion.
  • Apply insulation gradually in layers rather than overfilling gaps at once—this helps prevent bulging or stress on surrounding materials.
  • Use caulking (preferably silicone-based) around edges where frames meet drywall indoors or siding outdoors.
  • Ensure all seals are smooth and uniform to block drafts effectively while maintaining aesthetic appeal.

Common Mistakes To Avoid

Mistake Impact
Using high-expansion foam Can warp frames and affect proper fitment
Skipping shim adjustments May lead to long-term misalignment issues
Overlooking moisture barriers Increases risk of water intrusion leading to structural damage

Take time during each step—leveling, securing, and insulating—to ensure a precise fit that maximizes durability while improving energy efficiency in your home’s overall envelope performance. A careful approach paves the way for years of trouble-free operation with minimal maintenance requirements.


Preparing Your Home for a Successful Window Replacement in Alexandria, VA

Close Up Of Construction Worker Preparing To Fit New Windows Close Up Of Construction Worker Preparing To Fit New Windows window repair stock pictures, royalty-free photos & images

Proper preparation is essential to ensure a smooth and hassle-free window replacement experience. Taking the time to get your home ready can save you from potential issues, protect your belongings, and help the installation crew work efficiently. Below are key steps to prepare your home for a successful window replacement project.

1. Clear the Area Around Windows

Before installation day, ensure that all areas around your windows are free from obstacles. This step will create enough space for installers to work efficiently and move tools or materials without damaging personal items.

  • Remove furniture: Relocate chairs, tables, or large pieces of furniture near windows to a safe location.
  • Take down window coverings: Remove curtains, blinds, or shades from all windows set for replacement.
  • Store fragile items: Move decorative pieces like vases, artwork, or frames located near windows.

2. Protect Interior Floors and Furniture

Dust and debris are inevitable during window replacement projects. Preparing in advance can help safeguard your floors and furnishings.

  • Use drop cloths or plastic sheets to cover floors near the windows.
  • Drape furniture with protective covers if it cannot be relocated.
  • Consider using painter’s tape along baseboards to minimize dust accumulation.

3. Prepare Outdoor Spaces

The exterior area around your home is equally important when replacing windows. Installers often need access to both the inside and outside of the house.

  • Trim bushes or tree branches near windows.
  • Relocate outdoor furniture or planters that may obstruct work.
  • Clear pathways leading up to doors and windows for easy equipment transport.
Task Recommended Action
Trim vegetation Cut back bushes at least 12 inches away
Remove outdoor décor Relocate sculptures or hanging ornaments
Ensure ladder access Create clear paths along walls

4. Secure Your Home’s Interior

If you have pets or small children, it’s crucial to keep them safe during the installation process.

  • Set up temporary barriers or gates in areas where installers will be working.
  • Consider boarding pets elsewhere for the day if they are sensitive to noise.
  • Inform all household members about restricted zones during installation hours.

5. Communicate with Installers

Open communication with your installation team is vital for an efficient process.

  • Confirm start times and estimated durations with the crew beforehand.
  • Discuss any special considerations (e.g., fragile flooring) so they can take extra precautions.
  • Provide installers with clear instructions on accessing your property if you won’t be home.

Thorough preparation ensures both a successful installation process and long-term satisfaction with your new windows. By following these steps—clearing spaces, protecting surfaces, securing interiors, prepping outdoors, and communicating with professionals—you’ll create an environment that promotes efficient work while safeguarding your home’s belongings.

9 Essential Tips for a Smooth Window Installation in Alexandria, VA

Proper preparation is key to ensuring a seamless window installation process. Whether you’re replacing old windows or installing new ones, following a few essential tips can help you avoid potential setbacks and achieve the best results possible. Below are nine crucial steps to consider for a smooth and efficient window installation process.

1. Choose the Right Window Type

Selecting the right type of window for your home is critical. Consider factors such as:
Energy efficiency: Look for windows with Energy Star ratings and low U-factor values.
Style and design: Double-hung, casement, sliding, or picture windows should match your home’s aesthetic.
Material: Options include vinyl, wood, fiberglass, or aluminum frames based on durability and maintenance needs.

2. Hire Professional Installers

Hiring experienced installers ensures precision and reduces the chances of costly mistakes. Look for professionals who offer:
– Proper licensing and insurance coverage.
– Positive reviews from past clients or references.
– Warranties covering both labor and materials.

3. Measure Accurately Before Ordering

Accurate measurements are critical when ordering new windows to avoid fitting issues during installation. While professionals often handle this step, you can double-check by measuring:
– The width at the top, middle, and bottom of the opening (take the smallest measurement).
– The height from sill to top at three points (again using the smallest measurement).

Pro tip: Always account for adjustments if your current openings are not perfectly square.

4. Schedule Installation During Favorable Weather

Plan installations during mild weather to ensure fewer disruptions caused by rain or extreme temperatures. Spring or early fall is typically ideal for this type of project.

5. Clear Obstacles Near Windows

Ensure all pathways inside your home are free of clutter to create an accessible workspace for installers: – Remove curtains, blinds, or shades from existing windows. – Clear furniture around installation areas. – Trim bushes or landscaping that obstructs outdoor access.

This step not only speeds up work but also prevents accidental damage to your belongings.

6. Communicate Expectations Clearly

Discuss project details with installers beforehand: – Timeline for completion. – Specific installation methods (e.g., full-frame vs retrofitting). – Any special considerations like noise restrictions in your neighborhood.

Good communication leads to fewer surprises during the process.

7. Protect Your Home’s Interior

Keep dust and debris from spreading by preparing adequately: 1. Use plastic sheeting or drop cloths over furniture near work areas. 2. Seal vents temporarily in rooms where work will occur. 3. Cover flooring near entrances where installers may track dirt indoors.

These measures help maintain cleanliness throughout your home.

Preparation Task Recommended Material
Furniture Protection Plastic sheeting/drop cloth
Vent Sealing Painter’s tape & plastic
Floor Coverage Durable tarps

8. Relocate Pets and Children Temporarily

For safety reasons, it’s smart to keep pets and children away from construction zones during installations so they don’t interfere with workers or risk injury due to tools being handled nearby.

9. Plan Ahead for Disposal

Decide how old materials like removed window frames will be disposed of before starting work: – Many contractors include disposal services in their pricing—verify this in advance. – If handling disposal yourself, check local regulations concerning recycling glass or wood products responsibly.

By addressing these areas ahead of time, you’ll help ensure that your window replacement project runs on schedule with minimal stress involved at any stage of implementation.

Professional handyman installing window at home. Professional handyman installing window at home. window repair stock pictures, royalty-free photos & images

Step-by-Step Guide to Measuring a Window or Door Opening for New Construction

Accurately measuring a window or door opening is critical to ensuring proper installation, energy efficiency, and long-term performance. Whether you are preparing for new construction or replacing old windows and doors, precise measurements can save time, reduce errors, and help you avoid costly adjustments. Follow this step-by-step guide to measure openings correctly.

Tools You’ll Need

  • Tape Measure: A sturdy tape measure with clear markings (preferably in both inches and millimeters).
  • Level: To check if the opening is plumb and level.
  • Notepad or Digital Device: To record measurements.
  • Pencil or Marker: For marking dimensions as needed.

Step 1: Measure the Width

  1. Start at the top of the opening and measure from one side jamb (vertical frame piece) to the other.
  2. Repeat this at the center of the opening.
  3. Finally, measure at the bottom of the frame.

Write down all three measurements and note which is smaller. Always use the smallest measurement as your final width to ensure a good fit.

Tip: If any measurement differs significantly (e.g., more than 1/4 inch), it may indicate that additional framing adjustments are required.

Step 2: Measure the Height

  1. Measure from the top of the rough sill (horizontal base) to either head jamb or lintel at three locations—left side, middle, and right side.
  2. Use the smallest of these three measurements as your final height dimension.

Check that there are no obstructions in this area that could interfere with installation.

Step 3: Check for Squareness

  1. Use a tape measure diagonally from one corner of the opening to its opposite corner.
  2. Repeat this step for both diagonal directions.
  3. If measurements differ significantly between diagonals (more than 1/8 inch), consider squaring up your framing before installing.

Step 4: Assess Depth Requirements

  • Place your tape measure across different points inside the opening.
  • Ensure compatibility with standard window depths; deeper frames may require custom sizing.

This step helps confirm that there’s enough space for securing insulation materials around frames while maintaining thermal efficiency.

Common Measurement Mistakes to Avoid

  • Do not estimate dimensions—always rely on precise tools.
  • Double-check all entries before sharing them with suppliers or contractors.
  • Avoid rounding up/down excessively when recording numbers; even slight inaccuracies can affect fitment.
Measurement Area Required Action Notes
Width Take smallest reading across top/middle/bottom Prevents over-sizing
Height Use narrowest reading along edges Ensures proper alignment
Diagonal Length Compare both diagonal measures Confirms structural squareness

By following these steps rigorously, you’ll set yourself up for a smoother installation process while minimizing potential delays due to improper fitment or unforeseen structural challenges later on during construction projects involving windows/doors replacements/constructions

Tips for Smooth Window Replacements in Windows Alexandria, VA

Why Clearing Paths is Essential

  • Remove Obstacles: Clear walking paths by moving furniture, rugs, and any items that block direct access to windows.
  • Relocate Fragile Items: Safely store fragile or valuable items like vases, picture frames, or electronics in another room.
  • Declutter Window Areas: Remove blinds, curtains, rods, or shutters from windows that are being replaced.

Taking these precautions ensures that installers can work efficiently without risking damage to your belongings.

Steps to Protect Furniture and Flooring

  1. Use durable drop cloths or plastic sheeting to shield furniture from dirt and debris.
  2. Secure covers with painter’s tape if needed to keep them in place.
  3. Relocate bulky items like couches or tables at least 3–4 feet away from windows being replaced.
  4. If moving isn’t an option due to space constraints, consider renting sliders for easier repositioning.
  5. Use canvas drop cloths or heavy-duty floor protection film on high-traffic areas.
  6. This reduces wear on floors that may see increased foot traffic during the installation process.
  7. To prevent dust spreading throughout your home, use plastic sheeting as temporary barriers on doorways of adjacent rooms.

Prepping Outdoor Areas

  • Trim landscaping around windows (e.g., bushes or tree branches) for unobstructed access.
  • Remove patio furniture or outdoor décor near the workspace.
  • Ensure driveways or pathways leading up to your home are clear of vehicles or other equipment so contractors can bring in tools easily.

Quick Checklist for Homeowners

Task Completed (✔/✘)
Remove blinds/curtains
Move nearby furniture
Cover remaining furniture
Lay protective floor coverings
Declutter outdoor areas near windows
Ensure clear access pathways

By following this checklist systematically, you’ll create a safer environment while also speeding up the overall process.

Proper preparation before window replacements not only minimizes disruptions but also helps protect valuable household items from potential damage. Both homeowners and contractors benefit when there’s clear access combined with thorough protective measures in place.

Handyman fixing the window with screwdriver Handyman fixing the window with screwdriver window repair stock pictures, royalty-free photos & images

How to Clear Paths and Protect Furniture During Window Replacements

Proper preparation of your home is critical for a seamless and efficient window replacement process. Clearing paths and protecting furniture not only ensures the safety of your belongings but also minimizes disruptions during the project. Below, we provide detailed guidance on how to prepare your space effectively.

Clear Pathways for Easy Access

  • Remove Obstructions: Move any furniture, rugs, or decorative items from the spaces near windows that will be replaced. This includes side tables, chairs, and lamps.
  • Clear Outdoor Areas: If possible, trim back shrubs or tree branches near exterior windows. Also, relocate outdoor furniture or equipment near the work zone.
  • Provide a Direct Path: Ensure there’s a clear path from the entry point of your home to the window installation areas. This helps prevent accidents and facilitates quicker transport of tools and materials.

Protecting Furniture and Belongings

  • Cover Furniture With Drop Cloths or Plastic Sheets: Use plastic covers or canvas tarps to protect larger items like sofas, beds, or dining tables from dust accumulation.
  • Remove Wall Decorations: Take down any artwork, mirrors, or shelves mounted near windows being worked on. Vibrations from installation tools could cause objects to fall.
  • Store Fragile Items in a Safe Area: Relocate fragile belongings such as vases, picture frames, and glassware away from work zones.
Item Category Action Recommended Material/Tool
Furniture Cover with protective sheets Drop cloths, plastic covers
Rugs Roll up and store elsewhere Rope/tape for securing rolled rugs
Wall Decorations Remove items temporarily Bubble wrap for fragile objects
Electronics Relocate far away from active zones Storage bins for small devices

Minimize Dust Spread

  • Seal Off Adjacent Rooms: Use painter’s tape and plastic sheeting to cover doorways leading to other parts of your home.
  • Use Temporary Floor Protection: Install adhesive floor runners over carpets or hardwood surfaces in high-traffic areas around the workspace.
  • Close HVAC Vents in Work Zones: Prevent debris from circulating by temporarily closing vents in rooms where windows are being replaced.

Communicate With Your Installation Team

Ahead of the installation date, discuss preparations with your contractor to align expectations regarding workspace needs. Some teams may provide extra protective materials like tarps or suggest additional measures specific to their process.

By following these steps—clearing paths, protecting furniture effectively, managing dust spread, and maintaining open communication—you create an organized environment that supports both efficiency and safety during window replacements.

Why It’s Important to Relocate Pets and Children Before a Window Installation Project

Window installation involves various activities that could pose safety risks to pets and children if they remain in the home. From debris and loud noises to the presence of unfamiliar people, ensuring a secure environment for all household members is crucial. Relocating pets and children during the installation process not only keeps them safe but also ensures the project proceeds efficiently without interruption. Below is a detailed look at why this step is essential, as well as practical tips for managing the process.

Potential Hazards During Window Installation

  1. Debris and Sharp Objects:
    During window replacement, materials such as broken glass, nails, screws, or other debris might fall or spread across the workspace. Pets or children wandering into these areas can suffer injuries.
  2. Loud Noises:
    The use of tools like drills, hammers, and saws creates excessive noise. This can be distressing for both pets (especially dogs and cats) and young children, potentially causing stress or anxiety.
  3. Unfamiliar People:
    Professional installers working in your home may be strangers to your pets or kids. This can lead to behavioral issues like barking in dogs or nervousness in children.
  4. Openings in Walls:
    During installation, large openings are left where windows are being replaced. These exposed areas can create opportunities for pets or toddlers to escape from your home.
  5. Chemical Exposure:
    Certain sealants or adhesives used during window installations may release fumes that are harmful if inhaled by sensitive individuals like young children or animals.

Tips for Relocating Pets and Children

  • Arrange a Temporary Stay Elsewhere: Consider asking family members, friends, or neighbors to temporarily care for your pets and children on installation day.
  • Use a Designated Safe Room: If relocation is not feasible, confine pets and small children to a separate room far from the work area with closed doors.
  • Plan Outdoor Activities for Children: Organize outdoor playtime at local parks or recreational centers during peak installation hours.
  • Utilize Pet Crates or Carriers: For short-term containment within your home, use crates for dogs or carriers for cats.
  • Hire Professional Pet Sitters: In cases where extended care is needed over multiple days of work, hiring professional sitters may be an effective solution.

Benefits of Relocation

Benefit Explanation
Enhanced Safety Minimizes injury risk caused by tools, debris, loud noises, or open spaces
Reduced Stress Prevents anxiety in pets and young ones caused by unfamiliar sounds/people
Ensures Installer Efficiency Eliminates interruptions so workers can focus on completing tasks promptly

Additional Preparations

To make this process seamless: – Notify your window installers ahead of time about any safety concerns related to kids/pets. – Remove pet beds/toys from work zones. – If relocating isn’t possible due to scheduling conflicts, monitor their behavior closely throughout the project.

Taking proactive measures will contribute significantly toward creating an efficient window replacement process while ensuring every member of your household remains safe from potential risks during this period.

Comprehensive Planning for Post-Installation Cleanup and Energy Conservation

Proper planning for post-installation cleanup and energy efficiency maximizes the benefits of your new windows. Once the installation is complete, taking a strategic approach to cleaning and optimizing energy use ensures that your windows perform well while keeping your home in pristine condition. Below is a guide on how to achieve this effectively.

Post-Installation Cleanup Checklist

  • Remove Installation Debris:
    Collect all leftover materials such as old window frames, nails, screws, or any construction waste. Most professional installers will provide basic cleanup but confirm this beforehand.
  • Vacuum Dust and Particles:
    Use a vacuum cleaner with a HEPA filter to remove fine dust from window sills, surrounding walls, and flooring. This prevents airborne particles from settling on other furniture or surfaces.
  • Wash New Windows:
    Clean the newly installed windows with a mild glass cleaner and microfiber cloth to remove fingerprints or residue left during installation. Avoid using abrasive cleaners that could scratch the glass or frames.
  • Inspect Seals and Caulking:
    Check for any excess caulking around the edges of the window frames. Trim away uneven areas carefully using a utility knife to ensure an aesthetic finish.
  • Dispose of Materials Responsibly:
    Recycle old window glass and metal components as per local guidelines where possible. Many communities offer eco-friendly disposal options for construction materials.

Enhancing Energy Efficiency After Installation

  1. Inspect Weatherstripping:
    Ensure weatherstripping around the new windows is secure without gaps or misalignments. Proper seals prevent drafts that could compromise energy efficiency.
  2. Install thermal curtains or blinds to control sunlight exposure during peak summer hours.
  3. Use insulated drapes during winter months to retain indoor heat more efficiently.
  4. Clean tracks regularly to prevent dirt buildup from affecting operability.
  5. Lubricate hinges or sliders annually if applicable.
  6. Conduct Energy Testing:
    Invest in an infrared thermometer or engage professionals for thermal imaging checks around new installations to identify potential heat loss areas.

Benefits of Planning Ahead

Task Benefit
Thorough Cleaning Prevents allergies by minimizing dust accumulation after installation
Proper Insulation Adjustments Reduces heating and cooling costs through enhanced thermal performance
Recycling Materials Promotes sustainability by reducing waste sent to landfills

By combining careful cleanup practices with energy-conscious strategies, you can enjoy both aesthetic improvements and cost savings following your window installation project while fostering an eco-friendly household environment at the same time.


10 Important Factors to Consider Before Choosing Replacement Windows Alexandria, VA

installation of plastic windows construction worker sets of metal and plastic window window repair stock pictures, royalty-free photos & images

Replacing your windows is a significant investment that can improve your home’s energy efficiency, curb appeal, and overall comfort. Before you begin the process, it’s important to weigh various factors to ensure you make the right decision for your home and budget. Below are ten essential considerations to keep in mind.


Vinyl: Affordable, low maintenance, and energy-efficient but less customizable in appearance.
Wood: A classic option offering superior aesthetics but requiring regular upkeep to prevent rot or warping.
Aluminum
Fiberglass: Long-lasting and low-maintenance with better insulation properties but higher upfront costs.

– Laminated glass for enhanced security and soundproofing.

Look for windows with an ENERGY STAR® rating or high U-value/R-value ratings for optimal insulation performance: | Term | Definition | |—————-|—————————————————————————–| | U-value| Measures how well a window prevents heat loss (lower values are preferable).R-value| Indicates resistance to heat flow (higher values are better).

Energy-efficient windows can reduce heating and cooling expenses over time while keeping indoor temperatures consistent.

Even the best-quality windows will underperform if they’re not installed properly. Ensure you hire experienced contractors who are licensed and insured.

Windows can vary widely in price based on material, size, brand, and customization needs. Set a realistic budget that considers both product costs and labor fees.

Your region’s weather heavily influences the type of windows you should choose:
– Hot climates may benefit from solar control glass. – Cold climates often require insulated frames with multiple panes.

Research products designed specifically for your environment.

Select window designs that complement your home’s architectural style: – Casement or awning windows work well in modern homes. – Double-hung windows suit traditional styles like colonial or Victorian homes.

Maintaining visual harmony enhances curb appeal.

Windows play a crucial role in home safety: – Reinforced locks or multi-point locking systems provide added protection. – Laminated or tempered glass resists breakage better than standard panes.

Consider how much time you’re willing to invest in maintaining your new windows: – Vinyl requires minimal care but offers limited color choices. – Wood offers greater customization but demands regular staining or painting.

Review warranties provided by manufacturers or contractors to understand what is covered (e. g. , glass breakage, hardware defects) and how long the coverage lasts.

Making an informed decision about replacing your windows ensures long-term benefits such as improved energy efficiency, reduced maintenance costs, and enhanced aesthetic value for your home.

Exploring Glass Options and Features for Windows in Alexandria, VA

Selecting the right type of glass for your windows is a critical aspect of any window replacement project. The right choice can impact energy efficiency, noise reduction, and overall comfort in your home. Before making a decision, it’s essential to understand the different types of glass available and how their performance varies. Below, we explore key factors to consider when evaluating glass types and performance metrics.

Exploring Types of Window Glass for Window Repair Alexandria, VA

  1. Least energy-efficient option.
  2. Found in older homes or structures with minimal insulation needs.
  3. Not ideal for areas with extreme temperatures or noise concerns.
  4. Features two layers of glass separated by an insulating gas (usually argon or krypton).
  5. Provides better thermal insulation compared to single-pane windows.
  6. Improves energy efficiency and reduces utility costs over time.
  7. Contains three layers of glass with insulating gas between each pane.
  8. Ideal for colder climates or areas exposed to high levels of outdoor noise.
  9. Coated with a thin metallic layer to reflect heat while allowing visible light through.
  10. Helps regulate indoor temperature by keeping heat inside during winter and outside during summer.
  11. Strengthened through a heating-and-cooling process, making it more durable than standard glass.
  12. Breaks into small, less dangerous pieces when shattered, improving safety.
  13. Composed of two layers of glass bonded together with an interlayer (often made from polyvinyl butyral).
  14. Reduces sound transmission significantly while offering added security against break-ins.

Key Performance Metrics for Window Glass Replacement Alexandria, VA

Metric Description
U-Factor Measures the rate at which heat escapes through the window; lower values indicate better insulation properties.
Solar Heat Gain Coefficient (SHGC) Indicates how much solar radiation passes through the glass; lower SHGC values reduce heat gain from sunlight in warmer climates.
Visible Transmittance (VT) Represents how much natural light filters through the glass; higher VT values mean more daylight enters your space without obstruction.
Sound Transmission Class (STC) Rates the ability of the window to block sound; higher STC values are preferred for noise reduction purposes.

Matching Glass Type with Your Needs

  • If privacy is a concern, frosted or tinted laminated glass can be beneficial.
  • In high-noise environments like urban locations or near highways, prioritize triple-pane windows with good STC ratings.
  • For safety-focused applications such as skylights or patio doors, choose tempered or laminated glass options.

Benefits of Optimizing Glass Selection

  • Enhanced comfort by reducing drafts and maintaining stable indoor temperatures.
  • Lower utility bills due to improved energy efficiency.
  • Protection from harmful UV rays that can fade flooring or furniture over time.
  • Elevated property value by installing modern, durable materials.

By understanding these factors and carefully assessing your priorities—whether it’s energy efficiency, security, aesthetics, or noise control—you’ll make well-informed decisions that improve the functionality and appearance of your home’s windows long-term.

How to Determine the Right Time to Replace Your Windows

Replacing your windows is a significant investment that can enhance your home’s functionality, energy efficiency, and aesthetic appeal. However, determining the right time to replace your windows isn’t always straightforward. By assessing certain factors, you can identify when it’s time to take action. Below are key indicators and considerations to help you decide if a window replacement is necessary.

Signs That Indicate It’s Time for Window Replacement

  1. Cracked or broken glass
  2. Warped frames that no longer fit properly
  3. Rotting or mold on wooden frames
  4. Difficulty in opening or closing windows
  5. Drafts and Air Leaks
    If you feel cold air seeping through closed windows during winter or warm air entering your home during summer, this could be a sign of poor insulation caused by aging seals or gaps around the frame. Drafty windows increase energy usage as HVAC systems work harder to maintain indoor temperatures.
  6. Condensation Between Glass Panes
    Double- or triple-pane windows often develop condensation between the panes when the seal has failed. This not only affects visibility but also reduces thermal efficiency.
  7. Increased Energy Bills
    Old, inefficient windows can significantly impact energy consumption by allowing heat transfer, forcing you to use more heating or cooling throughout the year.
  8. Excessive Noise Transfer
    Single-pane windows or aging dual-pane models may fail to block external noise effectively—a common issue in busy urban areas. Modern replacements with soundproofing options can enhance comfort.

Factors That May Influence Your Decision

Factor Consideration
Age of Your Home/Windows Most windows last 15–30 years; if yours are older, replacement may be due.
Seasonal Conditions Replacing windows before extreme weather (summer/winter) ensures comfort.
Home Renovation Plans Consider aligning window replacement with other remodeling projects for cost efficiency and convenience.

Benefits of Timely Window Replacement

  • Enhanced Security:Updated locking mechanisms and shatter-resistant glass options provide better safety for your household.
  • Improved Home Value:Modernized windows boost curb appeal and make homes more attractive to potential buyers.
  • Lower Maintenance Costs:New materials such as vinyl or fiberglass require less upkeep compared to traditional wood frames prone to warping or rotting.

When Repairs May Be Sufficient

It’s worth noting that not all issues demand full replacement—sometimes repairs are enough:
– Minor cracks in single-pane glass can be fixed with resin solutions. – Re-caulking around panes may address small air leaks. – Replacing damaged weatherstripping can restore proper insulation temporarily.

However, these are typically short-term fixes that won’t resolve deeper structural damage or improve energy performance significantly.

Evaluating these aspects will help you determine whether it’s time for a full window replacement—or whether interim repairs might suffice until future upgrades become feasible.

Updating Your Windows and Doors to Enhance Energy Efficiency

Improving the energy efficiency of your home through window and door updates is a smart investment that can lead to reduced energy bills, increased comfort, and a smaller carbon footprint. When it comes to upgrading these essential components, there are several factors and strategies homeowners should consider to maximize the efficiency gains.

Benefits of Energy-Efficient Windows and Doors

  • Lower Utility Bills: Efficient windows reduce heat loss during winter and minimize heat gain during summer, which decreases heating and cooling costs.
  • Improved Comfort: These upgrades help maintain a consistent indoor temperature by reducing drafts or hot spots.
  • Enhanced Durability: Modern materials used in energy-efficient designs often ensure better longevity under varied weather conditions.
  • Environmental Impact: By reducing energy consumption, you contribute to lower greenhouse gas emissions.

Key Features to Look for in Energy-Efficient Windows

  1. This reduces heat transfer significantly.
  2. Double-pane or triple-pane windows are more effective in insulating against temperature changes than single-pane options due to the air or gas-filled layers between panes (commonly filled with argon or krypton).
  3. Opt for frames made from materials such as vinyl, fiberglass, or composite wood that provide better insulation compared to traditional aluminum frames.
  4. Look for Energy Star-rated products that meet specific energy performance standards for your climate zone.

Choosing Energy-Efficient Doors

Doors also play a critical role in your home’s overall energy efficiency.

  • Choose doors with insulated cores made from foam materials like polyurethane to prevent thermal transfer effectively.
  • Ensure all doors have high-quality weatherstripping around the edges to eliminate gaps where air may leak through.

Cost Comparison Table

Feature Average Additional Cost Potential Savings on Utilities (%) Payback Period (Years)
Low-E Glass $50–$100 per window 12–15% 2–5
Double-Pane vs Single-Pane $100–$300 per window 20–25% 3–7
Insulated Door Core $200–$500 per door 10–20% 4–8

Practical Tips for Maximizing Efficiency After Installation

  • Regularly inspect seals and weatherstripping for wear-and-tear.
  • Use blinds or shades strategically to control solar heat gain during different seasons.
  • Maintain your HVAC system since efficient windows complement properly functioning heating and cooling systems.

By selecting high-performance materials and following best practices during installation, updating your windows and doors can become one of the most impactful ways to enhance both the comfort and efficiency of your living space over time.

Worker in the removing break down, windows in the home renovation living energy efficiency Worker in the removing break down windows in the home renovation living energy efficiency window repair stock pictures, royalty-free photos & images

Window Replacement Alexandria, VA: Front Doors and Windows to Elevate Your Home’s Curb Appeal

The exterior of your home is the first impression visitors receive, and front doors and windows play a critical role in setting the tone. Investing in stylish, well-designed, and functional doors and windows can significantly enhance your home’s curb appeal while also boosting its overall value. Here’s how you can make thoughtful choices for your front entryway.

Choosing a Statement Front Door

The front door serves as the focal point of your home’s exterior.

  • Wood: Timeless and elegant but requires regular maintenance to prevent warping or rotting.
  • Steel: Durable, energy-efficient, and offers great security.
  • Fiberglass: Resistant to wear-and-tear while mimicking the look of wood.
  • Color Selection: A bold color like red or navy blue can create a striking contrast, while neutral tones provide a more classic aesthetic. Consider coordinating the door’s color with window trims or shutters for a cohesive look.
  • Design Elements:
    Add decorative touches such as glass panels, sidelights, or transoms to create visual interest. Modern minimalist designs with clean lines can complement contemporary homes, whereas traditional homes may benefit from intricate carvings or scrollwork.
Door Material Benefits Maintenance Required
Wood Classic aesthetic High
Steel Strong security & energy efficiency Low
Fiberglass Weather-resistant & stylish Minimal

Enhancing Windows for Maximum Impact

Windows are another critical component when creating an inviting exterior. Well-placed and thoughtfully designed windows not only brighten interiors but also contribute to the overall style of your home.

Tips for Selecting Windows:

  1. Vinyl frames are affordable and low-maintenance.
  2. Aluminum frames offer a sleek appearance but may lack insulation.
  3. Wood frames provide warmth but require upkeep.
  4. For traditional homes: Double-hung or casement windows are perfect for maintaining classic charm.
  5. For modern homes: Picture or horizontal slider windows add contemporary flair.
  6. Coordinate Shapes & Sizes: Symmetry matters when designing attractive exteriors. Use evenly proportioned window sizes to establish balance across your façade.

Decorative Window Features that Elevate Style:

  • Grilles & Muntins: Customize patterns that match architectural styles (e. g. , colonial grids).
  • Window Boxes: Add greenery or flowers beneath ground-floor windows to soften sharp edges.
  • Shutters: Functional or purely decorative shutters help frame windows while enhancing visual appeal.
Window Style Architectural Compatibility
Double-Hung Perfect for Colonial/Traditional
Picture Window Best for Modern Homes
Casement Versatile across styles

Balancing Functionality with Aesthetics

Curb appeal isn’t just about looks—it’s also about practicality: – Select energy-efficient options like double-paned glass to reduce thermal transfer. – Opt for impact-resistant glass if you live in areas prone to storms. – Ensure both doors and window locks meet current safety standards.

By strategically choosing front doors and windows that align with your home’s architecture and needs, you’ll create an inviting exterior that speaks volumes about your property’s character.

Window Installation Alexandria, VA: Front Doors and Windows to Elevate Your Home’s Curb Appeal

The exterior of your home creates the first impression, making it essential to select front doors and windows that enhance its curb appeal. Upgrading these features not only improves the aesthetic value of your home but can also increase its overall market value. Below, we outline key points to consider when choosing front doors and windows that truly elevate your home’s appearance.

Factors to Consider When Choosing Front Doors

  1. Wood: Offers a classic and timeless look; best for traditional or craftsman-style homes.
  2. Steel: Durable, secure, and low-maintenance; ideal for modern or industrial aesthetics.
  3. Fiberglass: Highly versatile in design while being energy-efficient and durable.
  4. Glass Panels: Add sophistication while allowing natural light to enter your home.
  5. Style Choices
    Ensure that the door style complements the architecture of your home:
  6. A sleek, minimalist design suits contemporary homes.
  7. Paneled or decorative doors work well with colonial or Victorian homes.
  8. Rustic finishes are perfect for farmhouse designs.
  9. Color Palette
    Bold colors like red, navy blue, or black can make a statement, whereas neutral tones like white or beige create a more understated elegance. Coordinate door color with window frames and trim for a cohesive look.
  10. Hardware Accents
    Choose high-quality handles, locks, and hinges that align with your desired style theme—whether modern chrome finishes or antique brass elements.

Enhancing Curb Appeal Through Window Design

  1. Window Styles Different window styles cater to distinct architectural designs:
  2. Bay Windows: Add depth and visual interest while maximizing natural light.
  3. Casement Windows: Provide a sleek appearance suitable for contemporary homes.
  4. Double-Hung Windows: Offer versatility in both traditional and modern homes.
  5. Awning Windows: Combine excellent ventilation with an unobtrusive design.
  6. Frame Materials The type of frame material significantly affects durability and design: | Material | Benefits | Ideal For | |————–|————————————-|————————————-| | Vinyl | Cost-effective & low-maintenance | Budget-focused homeowners | | Aluminum | Strong & sleek | Modern/minimalist designs | | Wood | Warmth & timeless appeal | Traditional or rustic aesthetics | | Composite | Energy-efficient & durable | Any architectural style |
  7. Grid Patterns Grids add character to window panes:
    • Colonial grids create symmetry in traditional homes.
    • Prairie grids offer an arts-and-crafts-inspired touch.
    • Custom patterns allow creative flexibility.

Combining Front Doors and Windows

To achieve a cohesive exterior design: – Match materials (e. g. , wood-framed windows with wooden doors).
– Choose complementary colors or finishes for consistent visuals across all entries/exits of the house. – Integrate similar glass accents on both the door panels and nearby windows for alignment.

By thoughtfully combining functionality with aesthetic details in your front doors and windows, you can significantly transform the exterior appeal of your home while reflecting personal style preferences effectively.


Finding the Best Replacement Windows Alexandria, VA Has to Offer for Your Home

Installation of a mosquito net on a large window outside a modern building Installation of a mosquito net on a large window outside a modern building. An experienced installer installs a protective net against insects on a plastic window window repair stock pictures, royalty-free photos & images

Selecting the right replacement vinyl windows for your home can significantly enhance its aesthetics, improve energy efficiency, and increase overall comfort. With a wide variety of window styles, materials, and features available in today’s market, it’s essential to make an informed decision. Below is a comprehensive guide to help you choose the best replacement vinyl windows tailored to your needs.

Benefits of Vinyl Windows

  • Durability: Vinyl windows are resistant to peeling, cracking, and warping. Their long-lasting nature makes them an excellent investment.
  • Low Maintenance: Unlike wood frames that require regular painting or sealing, vinyl windows require minimal upkeep—just occasional cleaning with soap and water.
  • Energy Efficiency: Many vinyl windows are designed with insulated frames and double or triple-pane glass that reduces heat transfer and lowers energy bills.
  • Affordability: Compared to other materials like wood or aluminum, vinyl is more cost-effective without compromising quality or performance.
  • Variety of Options: They come in various colors, finishes, and styles to suit any home design.

Key Features to Look For

  1. Look for windows with an Energy Star label that meet strict guidelines for energy efficiency set by the U.S. Environmental Protection Agency (EPA).
  2. Double-pane or triple-pane glass improves insulation by reducing heat transfer while also minimizing outside noise.
  3. A Low-E (low-emissivity) coating reflects heat back into your home during winter months while keeping it out during summer—resulting in year-round comfort and energy savings.
  4. Ensure frames are fusion-welded for added strength and durability rather than mechanically fastened with screws.
  5. Some vinyl windows have built-in UV protection that shields furniture and flooring from fading due to sunlight exposure.
  6. Consider window types like double-hung (easy cleaning), casement (excellent ventilation), or slider (space-saving design) depending on your specific needs.

Comparing Replacement Window Styles

Style Features Ideal For
Double-Hung Easy cleaning; both sashes open Bedrooms & living rooms
Casement Hinged at sides; excellent airflow Kitchens & hard-to-reach areas
Sliding Slides horizontally; compact design Small spaces & modern homes
Bay/Bow Creates extra space; dramatic effect Living rooms & dining areas
Picture Fixed; offers unobstructed views Scenic locations

Professional Installation Matters

Even the highest-quality replacement vinyl window will underperform if not installed correctly. It’s essential to hire skilled professionals who can ensure proper sealing and alignment during installation. Poor installation can lead to air leaks, water damage, and reduced energy efficiency.

  • Verify certifications or licensing specific to window installation.
  • Read reviews or request referrals from neighbors.
  • Request a detailed estimate outlining labor costs and materials used.
  • Ensure they offer warranties on both products and workmanship.

Taking time to assess your specific needs while considering these factors will help you make an informed decision about replacing old windows with high-quality vinyl options that provide long-term value for your home.

12 Essential Factors to Consider When Choosing Replacement Windows Alexandria, VA

Choosing the right replacement vinyl windows for your home is a decision that impacts not just the aesthetics of your property, but also its energy efficiency, durability, and overall value. Below are 12 key factors to help you make an informed choice.

1. Energy Efficiency

Energy-efficient windows can reduce heating and cooling costs over time. Look for features such as: – Low-E (Low-Emissivity) Glass: Minimizes heat transfer without sacrificing natural light. – Double or Triple Glazing: Provides better insulation by trapping air or gas (e.g., argon) between panes. – ENERGY STAR Certification: Ensures the window meets high standards for energy savings.

2. Window Style

Consider how different styles impact functionality and appearance: – Double-Hung Windows: Both sashes move up and down, allowing easy ventilation. – Casement Windows: Hinged at the side; open outward for maximum airflow. – Sliding Windows: Ideal for wide horizontal spaces.

Pick a style that complements your home’s architectural design while meeting practical needs.

3. Frame Material

Vinyl frames are durable, low-maintenance, and affordable: – Require minimal upkeep due to their resistance to peeling, cracking, or fading. – Available in various colors and finishes to match your home’s interior and exterior.

4. Glass Options

Modern vinyl windows offer customizable glass options tailored to specific needs: | Glass Type | Benefits | |————————|—————————————–| | Tempered Glass | Increased safety with shatter-resistant properties. | | Laminated Glass | Reduces noise levels and improves security. | | Tinted Glass | Reduces glare and solar heat gain. |

5. Durability

Vinyl windows provide long-term reliability when made from high-quality materials: – Avoid heavily recycled vinyl materials that may compromise strength. – Look for warranties that cover manufacturing defects.

6. Installation Process

A professional installation ensures proper sealing, preventing drafts or water leakage: – Confirm the installer is certified or licensed if required in your area. – Ask about weatherproofing techniques used during installation.

7. Customization Options

Choose windows with customizable features like grid patterns, hardware finishes, or decorative glass to enhance both aesthetics and functionality.

8. Security Features

Consider safety elements such as: – Multi-point locking systems for added security. – Impact-resistant glass in storm-prone areas.

9. Cost vs Value

While affordability is important, focus on value rather than choosing the cheapest option: – Invest in trusted brands with strong reputations for quality products.

Higher upfront costs may save money over time through reduced energy bills or fewer repairs.

10. Maintenance Requirements

Vinyl windows require minimal maintenance compared to wood or aluminum alternatives: – Cleaning typically involves soap and water only.

Avoid abrasive cleaners that might scratch surfaces.

11. Warranty Coverage

Examine warranty details closely: – Check coverage length (e.g., lifetime vs limited). – Ensure it includes protection against material defects or failed seals.

12. Environmental Impact

Many modern vinyl windows are eco-friendly due to their recyclable materials and energy-saving benefits: – Products made using sustainable practices help reduce environmental waste.

By considering these factors carefully, you’ll select replacement vinyl windows that align perfectly with your home’s needs while providing lasting performance benefits over time.

How to Select High-Quality Replacement Windows for Your Home

Choosing the right replacement windows is a critical decision for homeowners. Not only do high-quality windows enhance the aesthetic appeal of your home, but they also improve energy efficiency, provide better insulation, and increase property value. Here’s a guide to help you select top-notch replacement windows that meet your needs.

Key Features of High-Quality Replacement Windows

  • Energy Efficiency: Opt for windows with ENERGY STAR ratings. High-performance glass options such as low-E (low-emissivity) coatings reduce heat transfer and help maintain a stable indoor temperature.
  • Material Quality: Vinyl and wood are popular choices due to their insulating properties. Ensure the materials are durable and resistant to weathering or warping.
  • Durable Frames: Look for frames with reinforced construction or those made with composite materials, which offer added strength.
  • Glazing Options: Double-pane or triple-pane glass provides better insulation compared to single-pane options.
  • UV Protection: Some high-quality windows come with coatings that block harmful UV rays while still allowing natural light into your home.

Comparing Window Frame Materials

Frame Material Pros Cons
Vinyl Low maintenance, affordable, energy efficient Limited color choices
Wood Classic aesthetic, excellent insulation Requires regular maintenance
Aluminum Strong, lightweight Poor thermal performance
Fiberglass Durable, low maintenance Higher upfront cost

Questions to Ask When Choosing Replacement Windows

  1. What is the warranty coverage on these windows?
  2. Are there specific energy ratings associated with this window type?
  3. Does this product comply with local building codes?
  4. Can I customize window styles and finishes to match my home’s design?
  5. How long will these replacement windows last under normal conditions?

Tips for Selecting Trusted Window Brands

  1. Research customer reviews and testimonials online.
  2. Verify certifications such as ENERGY STAR compliance or NFRC (National Fenestration Rating Council) ratings.
  3. Check if the brand has been in business long enough to establish credibility.
  4. Confirm that their products come with robust warranties covering both materials and installation defects.

Professional Installation Matters

Even if you choose top-of-the-line replacement windows, improper installation can undermine their performance benefits. Make sure to hire professional installers who have experience working with your selected window type and brand.

By thoroughly assessing material quality, energy performance features, warranty terms, and installation expertise ahead of time, you’ll be able to select high-quality replacement windows that align perfectly with both your budget and lifestyle needs while ensuring long-lasting satisfaction in your home environment.

Construction worker sealing window with caulk indoors, closeup Construction worker sealing window with caulk indoors, closeup window repair stock pictures, royalty-free photos & images

A Comprehensive Guide to Choosing the Right Vinyl Windows for Any Space

Selecting the ideal vinyl windows for your space is an essential step in enhancing a home’s aesthetic appeal, energy efficiency, and overall functionality. With numerous styles, designs, and performance options available in the market, it’s important to focus on key factors that match your needs while ensuring long-term value. Below is a detailed guide to help homeowners make an informed decision.

Understand Your Space Requirements

Before choosing replacement vinyl windows, assess the specific needs of each room. Different spaces have unique requirements based on lighting, ventilation, and privacy preferences. Consider the following:
Living Rooms: Opt for larger window styles such as picture windows or bay windows to maximize natural light and curb appeal.
Bedrooms: Double-hung or casement windows offer functionality with improved ventilation while maintaining privacy.
Bathrooms: Frosted or textured glass in smaller-sized windows ensures privacy while allowing adequate natural light.
Kitchens: Sliding glass or casement windows are practical near countertops or sinks for easy operation.

Factors that Influence Your Choice

  1. Energy Efficiency
    Vinyl windows are known for their insulating properties. Look for energy-efficient features such as low-E coatings, multiple panes of glass (double or triple glazing), and gas-filled layers like argon to reduce heat transfer and lower utility costs.
  2. Durability
    High-quality vinyl resists warping, peeling, fading, and corrosion over time. Ensure the material includes UV stabilizers to withstand prolonged sun exposure.
  3. Style Options
    Vinyl windows come in a variety of styles including single-hung, double-hung, sliding, casement, awning, and fixed designs like picture windows. Choose a style that complements your home’s architecture while meeting functional needs.
  4. Frame Color & Finish
    Most modern vinyl options offer customizable colors beyond standard white frames. Ensure you select finishes designed to resist chipping or discoloration over time.
  5. Ease of Maintenance
    One key advantage of vinyl is its low-maintenance nature—frames only require occasional cleaning with soap and water to maintain their appearance.

Comparing Costs & Features

Feature Budget-Friendly Options Premium Options
Glazing Single-pane Double/triple pane with Low-E coating
Frame Design Standard white Custom colors/textures
Ventilation Style Fixed Casement/tilt-and-turn
Energy Ratings Standard glass ENERGY STAR certified models

Professional Installation Matters

Even with the best replacement vinyl window choice on hand, improper installation can lead to drafts and inefficiency over time. Ensure professional installation by certified experts who follow local building codes and standards.

Key benefits of professional installation include:
– Proper sealing to prevent air leakage. – Precise alignment for smooth operation. – Enhanced longevity due to correct mounting techniques.

Final Thoughts

Choosing the right vinyl windows involves balancing aesthetic appeal with practical considerations such as energy savings and durability. By evaluating space requirements alongside key product features like frame quality and glazing options, homeowners can ensure they invest in durable solutions tailored for any area of their home.

Window Replacement Alexandria, VA: Elevating Installation Standards Every Homeowner Should Know

A successful window installation requires attention to detail, proper planning, and adherence to high-quality standards. Elevating installation practices ensures not only long-term performance but also enhances the appearance, comfort, and energy efficiency of your home. Below is a comprehensive look at the key aspects every homeowner should understand about setting higher standards for window installation.

The Importance of Professional Installation

  • Precise Fitting: Properly measured and installed windows reduce air leaks and drafts.
  • Warranty Protection: Many manufacturers only honor warranties when licensed professionals complete the installation.
  • Time Efficiency: Professionals complete installations faster without compromising quality.

Key Steps to Ensure High Standards During Installation

  1. Measure window openings accurately to ensure a snug fit.
  2. Inspect the surrounding wall structure for signs of damage or rot that need repair before installation.
  3. Opt for high-performance sealants and weatherproofing materials.
  4. Invest in durable flashing tape to prevent moisture infiltration.
  5. Attention to Insulation:
    Gaps between the frame and wall should be filled with expanding foam insulation or caulk designed specifically for windows.
  6. Ensure frames are perfectly level and plumb to avoid operational issues like sticking sashes or uneven gaps.
  7. Double-check that all fasteners are secure but do not warp the frame.
  8. Test operability by opening and closing each window several times after installation.
  9. Inspect seals, caulking, and insulation for any potential weak points.

Common Mistakes to Avoid During Window Installation

Mistake Impact Solution
Incorrect Measurements Leads to gaps or forced fitting Always measure twice before ordering replacement windows
Skipping Insulation Results in drafts and energy inefficiency Use appropriate insulating materials
Poor Sealant Application Allows water infiltration causing damage Apply sealants evenly without leaving gaps
Neglecting Building Codes May result in fines or structural issues Work with certified professionals familiar with local codes

Factors That Impact Installation Quality

  • Window Type & Design: For instance, heavier windows like double-hung models require more skill during alignment than lightweight casement styles.
  • Weather Conditions: Installations performed in extreme temperatures may affect adhesive performance.
  • Contractor Experience: Highly skilled installers are less likely to make errors compared to inexperienced teams.

Benefits of Raising Window Installation Standards

  • Enhanced energy efficiency resulting from airtight seals
  • Better protection from external elements like rain, snow, or wind
  • Increased durability and extended lifespan of your new windows
  • A noticeable improvement in aesthetic appeal both inside and out

By understanding these principles, homeowners can collaborate effectively with professionals and ensure their investment delivers long-term satisfaction.

renovation work in an old house and replacing windows renovation work in an old house and replacing windows, building energy efficiency window repair stock pictures, royalty-free photos & images

Top Things to Know Before Installing Replacement Windows in Your Home

Installing replacement windows can significantly improve your home’s energy efficiency, aesthetic appeal, and overall value. However, before you begin the process, there are several critical factors to consider. Proper preparation and research can save time, money, and effort while ensuring the project meets your expectations. Below are some essential things to know before starting your replacement window installation.

1. Assess Your Needs

  • Are you looking to improve energy efficiency?
  • Do you want to reduce outside noise?
  • Is aesthetics a priority for curb appeal?
  • Are there specific structural issues or damages with existing windows?

Having a clear understanding of your needs will help narrow down choices.

2. Evaluate Window Types and Styles

  • Double-Hung Windows: Easy-to-maintain with sash movement for ventilation.
  • Casement Windows: Hinged at the side for better airflow.
  • Sliding Windows: Great for wide openings; easy to operate.
  • Bay or Bow Windows: Enhance visual appeal while adding interior space.

Choose a style that complements the function and layout of each room in your home.

3. Consider Frame Materials

Frame Material Benefits Drawbacks
Vinyl Energy-efficient, low-maintenance Fewer customization options
Wood Classic look; excellent insulation Prone to moisture damage if untreated
Aluminum Lightweight; modern appearance Less energy-efficient
Fiberglass Durable and versatile Higher upfront cost

Evaluate these options based on your budget and long-term maintenance preferences.

4. Understand Energy Efficiency Ratings

  • U-Factor: Measures heat transfer (lower is better).
  • Solar Heat Gain Coefficient (SHGC): Indicates how well a window blocks heat from sunlight (lower is better in warm climates; higher may be preferable in cold climates).
  • Energy Star Certification: Ensures compliance with federal energy efficiency standards.

Investing in energy-efficient products can lead to significant savings over time by reducing heating and cooling costs.

5. Plan for Proper Installation

  • Hire licensed professionals with experience in window installation.
  • Confirm contractors follow manufacturer guidelines during installation.
  • Ensure accurate measurements are taken to avoid drafts or leaks.

Improperly installed windows can result in air leakage, water damage, or reduced lifespan.

6. Budget Wisely

  1. Get multiple quotes from reputable installers.
  2. Prioritize key upgrades if working within limited financial constraints.
  3. Factor long-term benefits like reduced utility bills when analyzing upfront costs.

7. Check Warranties

Review warranty details carefully before making a purchase—both product warranties (for defects) and workmanship warranties (for issues related to installation). Choose providers offering comprehensive coverage for peace of mind.

Making informed decisions prior to installing replacement windows ensures both immediate satisfaction with results as well as lasting value over time through improved functionality and cost savings.

Improving Energy Efficiency with Proper Window Installation Techniques

Proper window installation is critical when it comes to improving your home’s energy efficiency. Windows play a significant role in regulating indoor temperatures, reducing energy waste, and lowering utility costs. Even the most energy-efficient windows can fail to perform as intended without proper installation techniques. Below, we explore how precise installation methods can enhance your home’s energy performance and comfort.

The Importance of Proper Window Installation

  • Increased Energy Loss: Poorly installed windows allow conditioned air to escape your home, making your heating or cooling systems work harder.
  • Higher Utility Bills: Energy loss through faulty window installations directly impacts your monthly energy expenses.
  • Moisture Problems: Improperly sealed windows can let in moisture, leading to mold growth, wood rot, or other structural issues.

Proper techniques not only maximize the benefits of replacement windows but also help extend their lifespan.

Key Techniques for Energy-Efficient Window Installation

  1. Accurate Measurements
    Careful measurements of the window opening are crucial before purchasing and installing replacement windows. This ensures a snug fit that minimizes gaps between the frame and wall.
  2. Use of weather-resistant barriers (WRBs) around the frame prevents water infiltration.
  3. High-quality caulking around edges seals gaps and prevents air leaks.
  4. Foam insulation may be applied between the frame and wall cavity for enhanced insulation.
  5. Leveling and Alignment
    Windows must be installed level and square within the opening:
  6. Misaligned frames may create uneven pressure points.
  7. Misalignment can lead to premature wear on both the hardware and seals.
  8. Sealing Joints Properly
    Seal joints thoroughly using durable materials such as:
  9. Polyurethane caulk or expanding foam
  10. Flexible flashing tape to prevent water penetration

Tips for Maintaining Energy Efficiency After Installation

  • Regularly inspect caulking for cracks or signs of wear.
  • Clean window tracks and sashes to ensure smooth operation.
  • Lubricate moving parts as needed to prevent damage over time.
  • Consider adding treatments like insulated curtains or tint films for an extra layer of thermal resistance.

Comparing Installation Techniques: Professional vs DIY

Factor Professional Installation DIY Installation
Tools Required Included with service Must be purchased/borrowed
Precision & Accuracy High Varies by skill level
Time Investment Typically quicker Tends to take longer
Warranty Coverage Often included None

Hiring a certified installer ensures you achieve maximum energy efficiency with minimal risk of errors.

Benefits of Energy-Efficient Windows Installed Correctly

When done right, proper window installation delivers several benefits: – Reduced heating/cooling costs – Improved indoor comfort – Lower environmental impact through decreased energy consumption – Enhanced property value due to modern upgrades

By combining high-quality windows with proper techniques during installation, homeowners can significantly improve their home’s overall energy efficiency while enjoying long-term savings on utilities.

Discover the Advantages of Professional Window Installation Alexandria, VA

Upgrading to modern replacement vinyl windows is a home improvement project that offers numerous benefits. These windows are designed to provide improved functionality, aesthetics, and energy efficiency. If you’re considering replacing your old windows, here’s an overview of the key advantages vinyl windows bring to your home.

1. Enhanced Energy Efficiency

  • Low-E Glass Coatings: Reflects heat while allowing natural light to enter, reducing heat gain in summers and heat loss in winters.
  • Double or Triple Glazing: Provides extra layers of insulation for better temperature regulation.
  • Argon or Krypton Gas Fills: Inert gas fills between panes reduce thermal transfer.

According to the U.S. Department of Energy (DOE), energy-efficient windows can reduce overall utility bills by up to 25%.

Feature Benefit
Low-E Glass Coating Reduces UV rays and heat transfer
Double/Triple Glazing Improves insulation
Argon Gas Fills Enhances thermal resistance

2. Low Maintenance Requirements

  • Warping
  • Cracking
  • Fading over time due to UV exposure

Simply cleaning with mild soap and water keeps them looking new for years.

3. Durability and Longevity

  • Moisture damage
  • Corrosion
  • Pest infestations (e.g., termites)

This durability ensures a long lifespan, often lasting decades without the need for replacement.

4. Improved Home Aesthetics

  • Sliding windows
  • Casement windows
  • Picture windows

Additionally, custom designs can match any architectural style or personal taste.

5. Noise Reduction Properties

Many modern vinyl window models feature soundproofing technology through multiple glazing layers and insulated frames. This helps create a quieter indoor environment by minimizing external noise pollution from traffic or neighbors.

6. Cost Effectiveness

Though initial costs may vary depending on the model and customization options chosen, replacement vinyl windows are typically among the most affordable window materials on the market today. Their long-term savings from reduced maintenance costs and lower energy bills make them a smart investment.

In summary, upgrading your home with modern replacement vinyl windows is a decision that provides substantial benefits across multiple dimensions—energy savings, durability, aesthetic appeal, noise reduction, and more—all while requiring minimal upkeep over time.


What to Expect During Your Professional Windows Alexandria, VA Installation Process

Construction worker installing window in house. Handyman fixing the window with screwdriver Construction worker installing window in house. Handyman fixing the window with screwdriver. window repair stock pictures, royalty-free photos & images

Initial Assessment and Measurements

The process begins with an initial consultation where professionals assess your home’s current windows and take precise measurements. Accurate measurements are crucial for ensuring a snug fit and avoiding air or water leaks. During this phase:
– Installers will inspect the condition of the surrounding window frames for any signs of damage or rot.
– They may recommend repairs or replacements if structural issues are present.
– Measurements for custom-fit windows are recorded to guarantee proper dimensions for fabrication.

Removal of Old Windows

On installation day, the team will carefully remove your existing windows while minimizing disruption to your home. This step typically involves:
– Removing window sashes, frames, or glass panels without damaging nearby walls or trim.
– Proper disposal of old materials in adherence to local recycling regulations (if applicable).

Pro Tip: Clear furniture or decorations near window openings prior to installation day to give installers ample space.

Preparing the Window Opening

Once old windows are removed, preparing the opening is a critical step before installing new units:
1. Inspecting the Opening – Installers check for any uneven surfaces or gaps that need adjustments. 2. Cleaning – Dust, debris, or leftover sealant from previous installations is cleared out. 3. Repairs – If necessary, minor repairs are conducted on damaged window sills or frames.

A properly prepared opening ensures that your new windows will fit securely and perform optimally.

Installation of New Windows

This stage involves setting up your new windows with precision and care:
– The installer carefully positions the new unit into place within the prepared frame. – Shims are used to level and adjust alignment where necessary. – Anchors and screws secure the frame firmly into place.

Professionals make sure that every aspect of installation meets manufacturer specifications as well as local building codes.

Step Purpose
Placing shims Ensures alignment and prevents future warping
Securing hardware Stabilizes frame against external forces

Sealing and Insulating

Sealing is essential for energy efficiency and weatherproofing:
– A high-quality caulking material is applied around edges to seal gaps. – Expanding foam insulation may be used in larger spaces between walls and frames.

These steps prevent drafts, moisture intrusion, and reduce energy loss over time.

Final Inspection & Cleanup

Before completing the job, professionals conduct a final review:
1. All hardware (locks/latches) is tested for functionality. 2. Windows are opened/closed multiple times to ensure smooth operation. 3. Clean-up services include removal of debris like packaging materials or leftover caulk.

Knowing what happens during professional window installation can alleviate concerns about disruptions or unexpected costs while helping you understand how experts achieve durable results tailored specifically for your home’s needs.

Step-by-Step Guide to Window Replacement Alexandria, VA: Insulating and Sealing Your New Window Frames

Proper insulation and sealing are critical steps in ensuring your new windows are energy-efficient, durable, and free from drafts or moisture leaks. Here’s a detailed guide to help you understand the process of insulating and sealing your newly installed window frames.

Why Is Proper Insulation Important?

Installing new windows isn’t just about aesthetics; the way they’re sealed and insulated significantly impacts:
Energy Efficiency: Properly sealed windows prevent heat loss in winter and reduce cooling costs in summer.
Moisture Prevention: Quality seals block water from entering your home, reducing the risk of mold or structural damage.
Soundproofing: Efficient insulation creates a barrier against outside noise for a quieter indoor environment.

Materials You’ll Need for Insulating and Sealing

Material Purpose
Expanding foam Fills gaps between window frames and walls.
Silicone caulk Creates a flexible, weatherproof seal.
Backer rod Provides support for caulking in larger gaps.
Utility knife Used to clean edges before applying materials.
Spray bottle (water) Helps smooth out caulk for an even finish.

The Step-by-Step Process

  1. Check that the window is properly aligned within its frame.
  2. Verify that all screws or fasteners are secure but do not overtighten, as this can distort the frame.
  3. Remove debris or dust from both inside and outside areas of the window frame.
  4. Ensure that old paint chips or leftover adhesive residue from prior installations have been cleared away.
  5. Identify any gaps between the window frame and wall structure.
  6. Use expanding foam specifically designed for windows—this type expands moderately to avoid warping frames.
  7. Apply foam evenly but avoid overfilling; excess foam can be trimmed once it hardens.
  8. Select silicone caulk suitable for exterior use as it provides excellent weather resistance.
  9. Apply a steady bead of caulk along edges where the window meets siding or trim.
  10. Smooth out with a gloved finger or caulking tool to create an even seal.
  11. For larger gaps, insert backer rods before applying caulk.
  12. Ensure rods fit snugly into spaces without being compressed too tightly.
  13. After sealing is complete, test by running your hand along edges on a windy day.
  14. For significant drafts detected post-installation, inspect areas again for missed spots or improperly applied materials.

Pro Tips for Long-Lasting Results

  • Always work during mild weather conditions (above freezing temperatures) since extreme cold can affect adhesives’ performance.
  • Avoid painting over fresh caulk until it has cured completely—this generally takes 24 hours depending on humidity levels.
  • Reinspect seals annually to identify cracks or wear caused by seasonal changes.

By following these steps carefully, you ensure your windows remain well-insulated against external elements while maximizing energy savings over time.

Preparing Your Home for Smooth and Efficient Window Installation Alexandria, VA

Proper preparation is key to ensuring your window installation process goes smoothly and efficiently. By taking the right steps beforehand, you can avoid unnecessary delays, protect your home from dust and debris, and help the professionals complete their work with minimal interruptions. Below are practical tips and insights to help you prepare your home effectively.

Clear the Work Area

To provide installers with easy access to your windows, take time to declutter both the interior and exterior spaces around them.

Steps to clear the area:
Remove Window Treatments: Take down curtains, blinds, shades, or other treatments on all windows being replaced.
Clear Furniture: Move any furniture or decorative pieces (tables, chairs, rugs) at least 3-4 feet away from windows.
Outdoor Preparation: Trim bushes or trees near the windows and remove any outdoor furniture or objects obstructing access.

This will create a safe workspace for installers and prevent accidental damage to your belongings.

Protect Your Belongings

  • Cover larger furniture items with drop cloths or plastic sheets if they cannot be moved.
  • Use tape or plastic sheeting to seal off adjacent rooms where possible.
  • Store fragile items like vases, picture frames, or electronics in a different room until after installation is complete.

A little protection goes a long way toward keeping your home clean during installation.

Ensure Access for Installers

  1. Unlocking all doors leading to the work areas ahead of time.
  2. Clearing hallways of any obstacles (shoes, boxes).
  3. Informing installers about alternative entrances if needed (e.g., garage).

This will enable workers to focus on their task without unnecessary disruptions.

Create a Safe Environment for Pets & Kids

The presence of sharp tools, broken glass, and construction noise makes it essential to secure pets and children during window installation.

Tips for safety:
– Keep pets in a separate room or outside until work is completed. – Inform children about restricted areas during installation. – Consider arranging childcare if you anticipate long periods of noise disturbance.

By taking these precautions, you not only ensure everyone’s safety but also allow the crew to work more efficiently.

Communicate Any Special Instructions

If there are specific details about your home that installers should know—such as fragile walls or historical features—communicate these ahead of time. This helps prevent accidental damages while respecting unique aspects of your property.

Additionally:
– Verify start times with the installer company so you’re prepared when they arrive. – Review project timelines so everyone stays aligned on expectations.

worker installing sealing tape on plastic window frame. copy space worker installing sealing tape on plastic window frame. banner with copy space window repair stock pictures, royalty-free photos & images

Essential Tips for Replacement Windows Alexandria, VA Before Installation Day

Task Action Needed
Declutter Work Areas Remove blinds/curtains; move furniture away from windows
Protect Surroundings Cover furniture; seal off nearby rooms
Ensure Installer Access Unlock doors; clear pathways
Secure Pets & Kids Keep out of work zone; inform about restricted areas
Communicate Instructions Share important details such as delicate features

Following these steps ensures not only an efficient installation process but also peace of mind knowing you’ve done everything possible for success. By preparing thoughtfully in advance, you’ll make both the experience smoother for yourself and more productive for the professionals working in your home.

Expert Tips for Choosing the Right Company for Window Repair Alexandria, VA

Selecting the right windows for your home is one of the most important decisions you’ll make during a renovation or construction project. Windows can impact not only your home’s aesthetics but also its energy efficiency, comfort, and resale value. Below are expert tips to guide you in making an informed decision that meets both your functional and design needs.

Evaluate Your Home’s Architectural Style

  • Traditional homes: Opt for double-hung or casement windows with divided panes to maintain a classic look.
  • Modern homes: Sleek, oversized picture windows with clean lines often work best.
  • Cottage or farmhouse styles: Consider awning or casement windows with grilles to achieve a rustic charm.

Matching window designs with your home’s character ensures a cohesive and polished appearance.

Consider Energy Efficiency Features

  1. Double- or Triple-Pane Glass: These layers provide insulation by trapping air or gas (like argon) between the panes.
  2. Low-E Coatings: Special coatings reflect heat while allowing natural light in, keeping interiors cooler in summer and warmer in winter.
  3. Gas Fills: Argon or krypton gas enhances insulation performance.
  4. Energy Star Certification: Windows with this label meet stringent energy performance standards set by the U.S. Environmental Protection Agency (EPA).

Investing in energy-efficient options may cost more initially but saves money over time through reduced energy bills.

Assess Frame Materials Based on Durability and Maintenance Needs

Material Pros Cons
Vinyl Affordable, low maintenance Limited color options
Wood Classic look, excellent insulation Requires regular upkeep
Aluminum Durable, modern aesthetic Poor insulator if not thermally broken
Fiberglass Strong, energy-efficient Higher price point
Composite Combines durability & low maintenance Costlier than vinyl

Choose a material that fits your budget and long-term maintenance preferences.

Prioritize Functionality for Your Lifestyle

  • For rooms requiring ventilation, consider operable options like casement or sliding windows.
  • In spaces where safety is vital (e.g., children’s bedrooms), opt for tempered glass or windows with secure locking mechanisms.
  • If privacy is crucial (bathrooms), frosted glass could be an ideal solution.

Additionally, consider ease of cleaning—tilt-in sashes on double-hung models make cleaning exterior glass panels much simpler.

Factor in Noise Reduction Properties

  • Look for laminated glass which reduces noise transmission.
  • Consider triple-pane models as their additional layer enhances sound insulation.
  • Check Sound Transmission Class (STC) ratings; higher STC values indicate better noise reduction capabilities.

Upgrading to sound-reducing windows can significantly improve indoor comfort by reducing external disturbances.

Think Long-Term Value Over Initial Cost

  • High-quality materials and energy-efficient features may have higher price tags but yield lower long-term maintenance and utility expenses.
  • Homes with modern, durable replacement windows often fetch higher resale values due to enhanced curb appeal and improved functionality.

Consider window replacements as an investment rather than just a purchase.

By carefully evaluating these factors—style compatibility, energy efficiency features, frame materials, functionality needs, noise reduction capabilities, and long-term value—you can confidently select the perfect windows tailored to your home’s unique needs while staying within budget constraints.

Top Benefits of Choosing Window Glass Replacement Alexandria, VA for Your Home

Upgrading your home with modern window replacements is more than just an aesthetic improvement—it’s a practical investment that brings numerous advantages. Whether you’re considering replacing outdated, inefficient windows or enhancing the overall functionality of your space, modern windows provide significant benefits. Below, we explore the key reasons why upgrading to modern window replacements is worth it.

1. Improved Energy Efficiency

One of the most significant advantages of modern window replacements is enhanced energy efficiency. By reducing energy loss, these windows help maintain a comfortable indoor temperature year-round.

Key features contributing to energy efficiency include:
Double or triple glazing: Provides excellent insulation by reducing heat transfer through the glass.
Low-emissivity (Low-E) coatings: Minimizes infrared and ultraviolet light penetration while maintaining visible light transmission.
Insulated window frames: Materials like vinyl, fiberglass, or wood offer better thermal resistance compared to older aluminum frames.

Table: Potential Energy Savings Based on Window Upgrades

Type of Window Upgrade Estimated Energy Savings (%) Annual Cost Savings (Approx.)*
Double-glazed windows 20–30% $150–$300
Triple-glazed Low-E windows 30–50% $250–$500

(*Note: Savings may vary by region and climate.)

2. Enhanced Curb Appeal and Aesthetic Value

Modern replacement windows are available in an array of styles, materials, and finishes to complement any home’s architectural design. By upgrading your windows, you can significantly boost the visual appeal of your property.

  • Customizable designs: Options for colors, shapes, and hardware allow homeowners to match their personal taste.
  • Improved frame materials: Sleek vinyl or fiberglass frames provide a clean look while requiring minimal maintenance over time.

3. Increased Home Value

Installing new windows can increase your home’s resale value by improving its energy performance and curb appeal—two key factors buyers prioritize. Many homeowners see a return on investment (ROI) ranging from 60% to 80% depending on their location and choice of materials.

4. Better Noise Reduction

Modern window designs incorporate advanced glazing technology that minimizes outside noise intrusion—ideal for homes in busy urban areas or near highways.

Noise-reducing technologies include:
– Laminated glass layers for soundproofing. – Multi-pane glass systems with gas-filled cavities for additional noise dampening.

5. Increased Comfort and UV Protection

Modern replacement windows are designed with features that improve indoor comfort levels:
UV-blocking coatings protect flooring, furniture, and artwork from fading due to prolonged sun exposure. – Reduced drafts ensure consistent interior temperatures even during extreme weather conditions.

Summary Table: Key Benefits Overview

Feature Benefit
Double/Triple glazing Improved insulation; reduced heating/cooling costs
Low-E Glass Blocks UV rays; maintains natural light
Advanced frame materials Lower maintenance; sleek aesthetics
Noise-reduction technologies Quieter indoor spaces

By understanding these key benefits, homeowners can make informed decisions when investing in new window installations tailored to their needs—a valuable step toward creating a more efficient and comfortable living environment without compromising style or durability.