
Proper preparation is essential to ensure a smooth and hassle-free window replacement experience. Taking the time to get your home ready can save you from potential issues, protect your belongings, and help the installation crew work efficiently. Below are key steps to prepare your home for a successful window replacement project.
1. Clear the Area Around Windows
Before installation day, ensure that all areas around your windows are free from obstacles. This step will create enough space for installers to work efficiently and move tools or materials without damaging personal items.
- Remove furniture: Relocate chairs, tables, or large pieces of furniture near windows to a safe location.
- Take down window coverings: Remove curtains, blinds, or shades from all windows set for replacement.
- Store fragile items: Move decorative pieces like vases, artwork, or frames located near windows.
2. Protect Interior Floors and Furniture
Dust and debris are inevitable during window replacement projects. Preparing in advance can help safeguard your floors and furnishings.
- Use drop cloths or plastic sheets to cover floors near the windows.
- Drape furniture with protective covers if it cannot be relocated.
- Consider using painter’s tape along baseboards to minimize dust accumulation.
3. Prepare Outdoor Spaces
The exterior area around your home is equally important when replacing windows. Installers often need access to both the inside and outside of the house.
- Trim bushes or tree branches near windows.
- Relocate outdoor furniture or planters that may obstruct work.
- Clear pathways leading up to doors and windows for easy equipment transport.
| Task | Recommended Action |
| Trim vegetation | Cut back bushes at least 12 inches away |
| Remove outdoor décor | Relocate sculptures or hanging ornaments |
| Ensure ladder access | Create clear paths along walls |
4. Secure Your Home’s Interior
If you have pets or small children, it’s crucial to keep them safe during the installation process.
- Set up temporary barriers or gates in areas where installers will be working.
- Consider boarding pets elsewhere for the day if they are sensitive to noise.
- Inform all household members about restricted zones during installation hours.
5. Communicate with Installers
Open communication with your installation team is vital for an efficient process.
- Confirm start times and estimated durations with the crew beforehand.
- Discuss any special considerations (e.g., fragile flooring) so they can take extra precautions.
- Provide installers with clear instructions on accessing your property if you won’t be home.
Thorough preparation ensures both a successful installation process and long-term satisfaction with your new windows. By following these steps—clearing spaces, protecting surfaces, securing interiors, prepping outdoors, and communicating with professionals—you’ll create an environment that promotes efficient work while safeguarding your home’s belongings.
9 Essential Tips for a Smooth Window Installation in Alexandria, VA
Proper preparation is key to ensuring a seamless window installation process. Whether you’re replacing old windows or installing new ones, following a few essential tips can help you avoid potential setbacks and achieve the best results possible. Below are nine crucial steps to consider for a smooth and efficient window installation process.
1. Choose the Right Window Type
Selecting the right type of window for your home is critical. Consider factors such as:
– Energy efficiency: Look for windows with Energy Star ratings and low U-factor values.
– Style and design: Double-hung, casement, sliding, or picture windows should match your home’s aesthetic.
– Material: Options include vinyl, wood, fiberglass, or aluminum frames based on durability and maintenance needs.
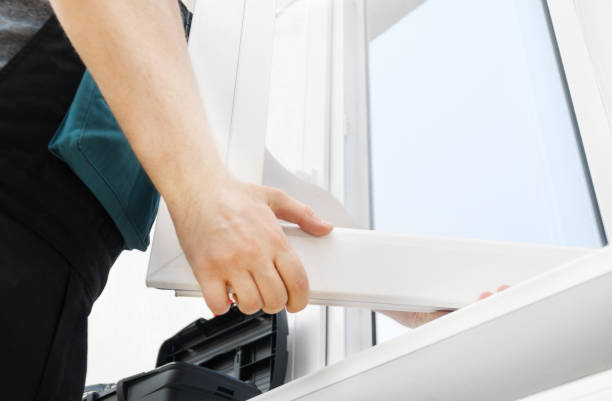
2. Hire Professional Installers
Hiring experienced installers ensures precision and reduces the chances of costly mistakes. Look for professionals who offer:
– Proper licensing and insurance coverage.
– Positive reviews from past clients or references.
– Warranties covering both labor and materials.
3. Measure Accurately Before Ordering
Accurate measurements are critical when ordering new windows to avoid fitting issues during installation. While professionals often handle this step, you can double-check by measuring:
– The width at the top, middle, and bottom of the opening (take the smallest measurement).
– The height from sill to top at three points (again using the smallest measurement).
Pro tip: Always account for adjustments if your current openings are not perfectly square.
4. Schedule Installation During Favorable Weather
Plan installations during mild weather to ensure fewer disruptions caused by rain or extreme temperatures. Spring or early fall is typically ideal for this type of project.
5. Clear Obstacles Near Windows
Ensure all pathways inside your home are free of clutter to create an accessible workspace for installers: – Remove curtains, blinds, or shades from existing windows. – Clear furniture around installation areas. – Trim bushes or landscaping that obstructs outdoor access.
This step not only speeds up work but also prevents accidental damage to your belongings.
6. Communicate Expectations Clearly
Discuss project details with installers beforehand: – Timeline for completion. – Specific installation methods (e.g., full-frame vs retrofitting). – Any special considerations like noise restrictions in your neighborhood.
Good communication leads to fewer surprises during the process.
7. Protect Your Home’s Interior
Keep dust and debris from spreading by preparing adequately: 1. Use plastic sheeting or drop cloths over furniture near work areas. 2. Seal vents temporarily in rooms where work will occur. 3. Cover flooring near entrances where installers may track dirt indoors.
These measures help maintain cleanliness throughout your home.
| Preparation Task | Recommended Material |
| Furniture Protection | Plastic sheeting/drop cloth |
| Vent Sealing | Painter’s tape & plastic |
| Floor Coverage | Durable tarps |
8. Relocate Pets and Children Temporarily
For safety reasons, it’s smart to keep pets and children away from construction zones during installations so they don’t interfere with workers or risk injury due to tools being handled nearby.
9. Plan Ahead for Disposal
Decide how old materials like removed window frames will be disposed of before starting work: – Many contractors include disposal services in their pricing—verify this in advance. – If handling disposal yourself, check local regulations concerning recycling glass or wood products responsibly.
By addressing these areas ahead of time, you’ll help ensure that your window replacement project runs on schedule with minimal stress involved at any stage of implementation.
Step-by-Step Guide to Measuring a Window or Door Opening for New Construction
Accurately measuring a window or door opening is critical to ensuring proper installation, energy efficiency, and long-term performance. Whether you are preparing for new construction or replacing old windows and doors, precise measurements can save time, reduce errors, and help you avoid costly adjustments. Follow this step-by-step guide to measure openings correctly.
Tools You’ll Need
- Tape Measure: A sturdy tape measure with clear markings (preferably in both inches and millimeters).
- Level: To check if the opening is plumb and level.
- Notepad or Digital Device: To record measurements.
- Pencil or Marker: For marking dimensions as needed.
Step 1: Measure the Width
- Start at the top of the opening and measure from one side jamb (vertical frame piece) to the other.
- Repeat this at the center of the opening.
- Finally, measure at the bottom of the frame.
Write down all three measurements and note which is smaller. Always use the smallest measurement as your final width to ensure a good fit.
Tip: If any measurement differs significantly (e.g., more than 1/4 inch), it may indicate that additional framing adjustments are required.
Step 2: Measure the Height
- Measure from the top of the rough sill (horizontal base) to either head jamb or lintel at three locations—left side, middle, and right side.
- Use the smallest of these three measurements as your final height dimension.
Check that there are no obstructions in this area that could interfere with installation.
Step 3: Check for Squareness
- Use a tape measure diagonally from one corner of the opening to its opposite corner.
- Repeat this step for both diagonal directions.
- If measurements differ significantly between diagonals (more than 1/8 inch), consider squaring up your framing before installing.
Step 4: Assess Depth Requirements
- Place your tape measure across different points inside the opening.
- Ensure compatibility with standard window depths; deeper frames may require custom sizing.
This step helps confirm that there’s enough space for securing insulation materials around frames while maintaining thermal efficiency.
Common Measurement Mistakes to Avoid
- Do not estimate dimensions—always rely on precise tools.
- Double-check all entries before sharing them with suppliers or contractors.
- Avoid rounding up/down excessively when recording numbers; even slight inaccuracies can affect fitment.
| Measurement Area | Required Action | Notes |
| Width | Take smallest reading across top/middle/bottom | Prevents over-sizing |
| Height | Use narrowest reading along edges | Ensures proper alignment |
| Diagonal Length | Compare both diagonal measures | Confirms structural squareness |
By following these steps rigorously, you’ll set yourself up for a smoother installation process while minimizing potential delays due to improper fitment or unforeseen structural challenges later on during construction projects involving windows/doors replacements/constructions
Tips for Smooth Window Replacements in Windows Alexandria, VA
Why Clearing Paths is Essential
- Remove Obstacles: Clear walking paths by moving furniture, rugs, and any items that block direct access to windows.
- Relocate Fragile Items: Safely store fragile or valuable items like vases, picture frames, or electronics in another room.
- Declutter Window Areas: Remove blinds, curtains, rods, or shutters from windows that are being replaced.
Taking these precautions ensures that installers can work efficiently without risking damage to your belongings.
Steps to Protect Furniture and Flooring
- Use durable drop cloths or plastic sheeting to shield furniture from dirt and debris.
- Secure covers with painter’s tape if needed to keep them in place.
- Relocate bulky items like couches or tables at least 3–4 feet away from windows being replaced.
- If moving isn’t an option due to space constraints, consider renting sliders for easier repositioning.
- Use canvas drop cloths or heavy-duty floor protection film on high-traffic areas.
- This reduces wear on floors that may see increased foot traffic during the installation process.
- To prevent dust spreading throughout your home, use plastic sheeting as temporary barriers on doorways of adjacent rooms.
Prepping Outdoor Areas
- Trim landscaping around windows (e.g., bushes or tree branches) for unobstructed access.
- Remove patio furniture or outdoor décor near the workspace.
- Ensure driveways or pathways leading up to your home are clear of vehicles or other equipment so contractors can bring in tools easily.
Quick Checklist for Homeowners
| Task | Completed (✔/✘) |
| Remove blinds/curtains | |
| Move nearby furniture | |
| Cover remaining furniture | |
| Lay protective floor coverings | |
| Declutter outdoor areas near windows | |
| Ensure clear access pathways |
By following this checklist systematically, you’ll create a safer environment while also speeding up the overall process.
Proper preparation before window replacements not only minimizes disruptions but also helps protect valuable household items from potential damage. Both homeowners and contractors benefit when there’s clear access combined with thorough protective measures in place.

How to Clear Paths and Protect Furniture During Window Replacements
Proper preparation of your home is critical for a seamless and efficient window replacement process. Clearing paths and protecting furniture not only ensures the safety of your belongings but also minimizes disruptions during the project. Below, we provide detailed guidance on how to prepare your space effectively.
Clear Pathways for Easy Access
- Remove Obstructions: Move any furniture, rugs, or decorative items from the spaces near windows that will be replaced. This includes side tables, chairs, and lamps.
- Clear Outdoor Areas: If possible, trim back shrubs or tree branches near exterior windows. Also, relocate outdoor furniture or equipment near the work zone.
- Provide a Direct Path: Ensure there’s a clear path from the entry point of your home to the window installation areas. This helps prevent accidents and facilitates quicker transport of tools and materials.
Protecting Furniture and Belongings
- Cover Furniture With Drop Cloths or Plastic Sheets: Use plastic covers or canvas tarps to protect larger items like sofas, beds, or dining tables from dust accumulation.
- Remove Wall Decorations: Take down any artwork, mirrors, or shelves mounted near windows being worked on. Vibrations from installation tools could cause objects to fall.
- Store Fragile Items in a Safe Area: Relocate fragile belongings such as vases, picture frames, and glassware away from work zones.
| Item Category | Action | Recommended Material/Tool |
| Furniture | Cover with protective sheets | Drop cloths, plastic covers |
| Rugs | Roll up and store elsewhere | Rope/tape for securing rolled rugs |
| Wall Decorations | Remove items temporarily | Bubble wrap for fragile objects |
| Electronics | Relocate far away from active zones | Storage bins for small devices |
Minimize Dust Spread
- Seal Off Adjacent Rooms: Use painter’s tape and plastic sheeting to cover doorways leading to other parts of your home.
- Use Temporary Floor Protection: Install adhesive floor runners over carpets or hardwood surfaces in high-traffic areas around the workspace.
- Close HVAC Vents in Work Zones: Prevent debris from circulating by temporarily closing vents in rooms where windows are being replaced.
Communicate With Your Installation Team
Ahead of the installation date, discuss preparations with your contractor to align expectations regarding workspace needs. Some teams may provide extra protective materials like tarps or suggest additional measures specific to their process.
By following these steps—clearing paths, protecting furniture effectively, managing dust spread, and maintaining open communication—you create an organized environment that supports both efficiency and safety during window replacements.
Why It’s Important to Relocate Pets and Children Before a Window Installation Project
Window installation involves various activities that could pose safety risks to pets and children if they remain in the home. From debris and loud noises to the presence of unfamiliar people, ensuring a secure environment for all household members is crucial. Relocating pets and children during the installation process not only keeps them safe but also ensures the project proceeds efficiently without interruption. Below is a detailed look at why this step is essential, as well as practical tips for managing the process.
Potential Hazards During Window Installation
- Debris and Sharp Objects:
During window replacement, materials such as broken glass, nails, screws, or other debris might fall or spread across the workspace. Pets or children wandering into these areas can suffer injuries. - Loud Noises:
The use of tools like drills, hammers, and saws creates excessive noise. This can be distressing for both pets (especially dogs and cats) and young children, potentially causing stress or anxiety. - Unfamiliar People:
Professional installers working in your home may be strangers to your pets or kids. This can lead to behavioral issues like barking in dogs or nervousness in children. - Openings in Walls:
During installation, large openings are left where windows are being replaced. These exposed areas can create opportunities for pets or toddlers to escape from your home. - Chemical Exposure:
Certain sealants or adhesives used during window installations may release fumes that are harmful if inhaled by sensitive individuals like young children or animals.
Tips for Relocating Pets and Children
- Arrange a Temporary Stay Elsewhere: Consider asking family members, friends, or neighbors to temporarily care for your pets and children on installation day.
- Use a Designated Safe Room: If relocation is not feasible, confine pets and small children to a separate room far from the work area with closed doors.
- Plan Outdoor Activities for Children: Organize outdoor playtime at local parks or recreational centers during peak installation hours.
- Utilize Pet Crates or Carriers: For short-term containment within your home, use crates for dogs or carriers for cats.
- Hire Professional Pet Sitters: In cases where extended care is needed over multiple days of work, hiring professional sitters may be an effective solution.
Benefits of Relocation
| Benefit | Explanation |
| Enhanced Safety | Minimizes injury risk caused by tools, debris, loud noises, or open spaces |
| Reduced Stress | Prevents anxiety in pets and young ones caused by unfamiliar sounds/people |
| Ensures Installer Efficiency | Eliminates interruptions so workers can focus on completing tasks promptly |
Additional Preparations
To make this process seamless: – Notify your window installers ahead of time about any safety concerns related to kids/pets. – Remove pet beds/toys from work zones. – If relocating isn’t possible due to scheduling conflicts, monitor their behavior closely throughout the project.
Taking proactive measures will contribute significantly toward creating an efficient window replacement process while ensuring every member of your household remains safe from potential risks during this period.
Comprehensive Planning for Post-Installation Cleanup and Energy Conservation
Proper planning for post-installation cleanup and energy efficiency maximizes the benefits of your new windows. Once the installation is complete, taking a strategic approach to cleaning and optimizing energy use ensures that your windows perform well while keeping your home in pristine condition. Below is a guide on how to achieve this effectively.
Post-Installation Cleanup Checklist
- Remove Installation Debris:
Collect all leftover materials such as old window frames, nails, screws, or any construction waste. Most professional installers will provide basic cleanup but confirm this beforehand. - Vacuum Dust and Particles:
Use a vacuum cleaner with a HEPA filter to remove fine dust from window sills, surrounding walls, and flooring. This prevents airborne particles from settling on other furniture or surfaces. - Wash New Windows:
Clean the newly installed windows with a mild glass cleaner and microfiber cloth to remove fingerprints or residue left during installation. Avoid using abrasive cleaners that could scratch the glass or frames. - Inspect Seals and Caulking:
Check for any excess caulking around the edges of the window frames. Trim away uneven areas carefully using a utility knife to ensure an aesthetic finish. - Dispose of Materials Responsibly:
Recycle old window glass and metal components as per local guidelines where possible. Many communities offer eco-friendly disposal options for construction materials.
Enhancing Energy Efficiency After Installation
- Inspect Weatherstripping:
Ensure weatherstripping around the new windows is secure without gaps or misalignments. Proper seals prevent drafts that could compromise energy efficiency. - Install thermal curtains or blinds to control sunlight exposure during peak summer hours.
- Use insulated drapes during winter months to retain indoor heat more efficiently.
- Clean tracks regularly to prevent dirt buildup from affecting operability.
- Lubricate hinges or sliders annually if applicable.
- Conduct Energy Testing:
Invest in an infrared thermometer or engage professionals for thermal imaging checks around new installations to identify potential heat loss areas.
Benefits of Planning Ahead
| Task | Benefit |
| Thorough Cleaning | Prevents allergies by minimizing dust accumulation after installation |
| Proper Insulation Adjustments | Reduces heating and cooling costs through enhanced thermal performance |
| Recycling Materials | Promotes sustainability by reducing waste sent to landfills |
By combining careful cleanup practices with energy-conscious strategies, you can enjoy both aesthetic improvements and cost savings following your window installation project while fostering an eco-friendly household environment at the same time.
- A Complete Guide to Replacement Windows Alexandria, VA: Types and Installation
- Essential Tools and Materials for Window Installation Alexandria, VA Projects
- Preparing Your Home for a Successful Window Replacement in Alexandria, VA
- 10 Important Factors to Consider Before Choosing Replacement Windows Alexandria, VA
- Finding the Best Replacement Windows Alexandria, VA Has to Offer for Your Home
- What to Expect During Your Professional Windows Alexandria, VA Installation Process
- Assessing Window Damage Before Installation in Alexandria, VA
- Understanding the Window Replacement Alexandria, VA Process and How to Prepare for It
- What to Know About Replacement Windows Alexandria, VA During a Professional Installation Process